Redpoint
Redpoint is a technology platform that provides marketers with a fully integrated campaign orchestration platform. Leverage Redpoint’s segmentation, scheduling, and automation capabilities to control how and when CDP data is imported to Braze.
The Braze and Redpoint integration allows you to create Braze segments based on your Redpoint CDP data. Redpoint provides two modes for passing data to Braze:
- Braze Onboarding and Upsert mode: “Upserts” a user profile from Redpoint into Braze. This is intended to be used for onboarding or updating user records when data has changed.
- Braze Append mode: Updates a user profile if that user already exists in Braze.
You’ll configure an export template and outbound channel for each mode.
“Upsert” is a combination of the words “update” and “insert.” It is used when you want to insert a new record into a database table if it doesn’t already exist or update the record if it does exist. Essentially, upsert checks whether a particular record is present in the database. If the record is present, it’s updated, and if it’s not present, a new record is inserted.
Prerequisites
| Requirement | Description |
|---|---|
| Braze REST API key | A Braze REST API key with users.track permissions. This can be created in the Braze dashboard from Settings > API Keys. |
| Braze REST endpoint | Your REST endpoint URL. Your endpoint will depend on the Braze URL for your instance. |
| Redpoint Data Management artifacts | The Braze integration is supported by a set of Redpoint Data Management artifacts. Contact Redpoint Support to request the artifacts for your version of Redpoint Data Management. |
If you are using the older navigation, you can create an API key at Developer Console > API Settings.
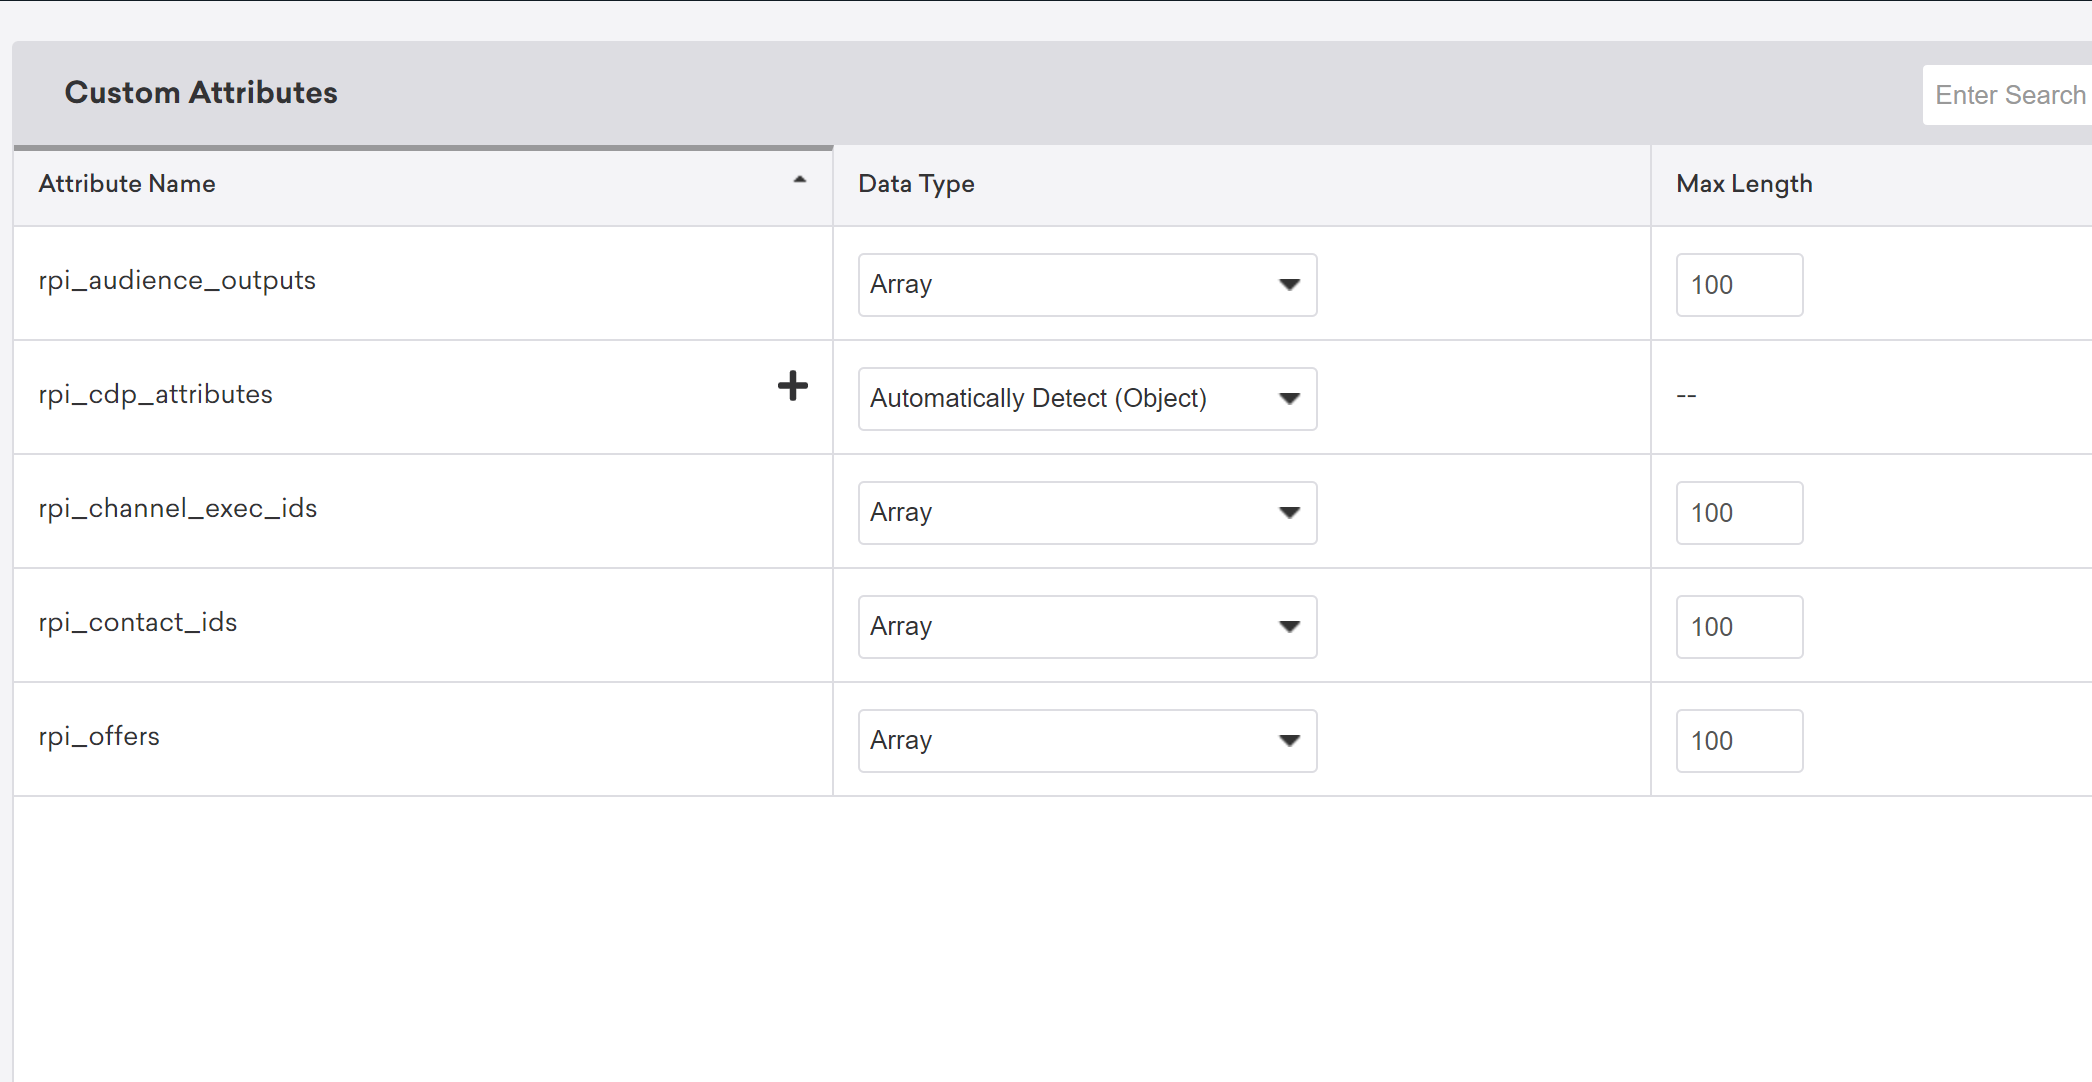
Redpoint CDP custom attributes
The following Redpoint custom attributes can be added to a Braze user profile.
| Field | Description |
|---|---|
rpi_cdp_attributes |
The Redpoint CDP profile attribute object |
rpi_audience_outputs |
Array of audience output tags where the user is targeted in a Redpoint Outbound Delivery Braze channel execution |
rpi_offers |
Array of offer tags where the user is targeted in a Redpoint Outbound Delivery Braze channel execution |
rpi_contact_ids |
Array of offer history contact IDs where the user is targeted in a Redpoint Outbound Delivery Braze channel execution |
rpi_channel_exec_ids |
Array of channel execution IDs where the user is targeted in a Redpoint Outbound Delivery Braze channel execution |
Integration
Step 1: Set up templates
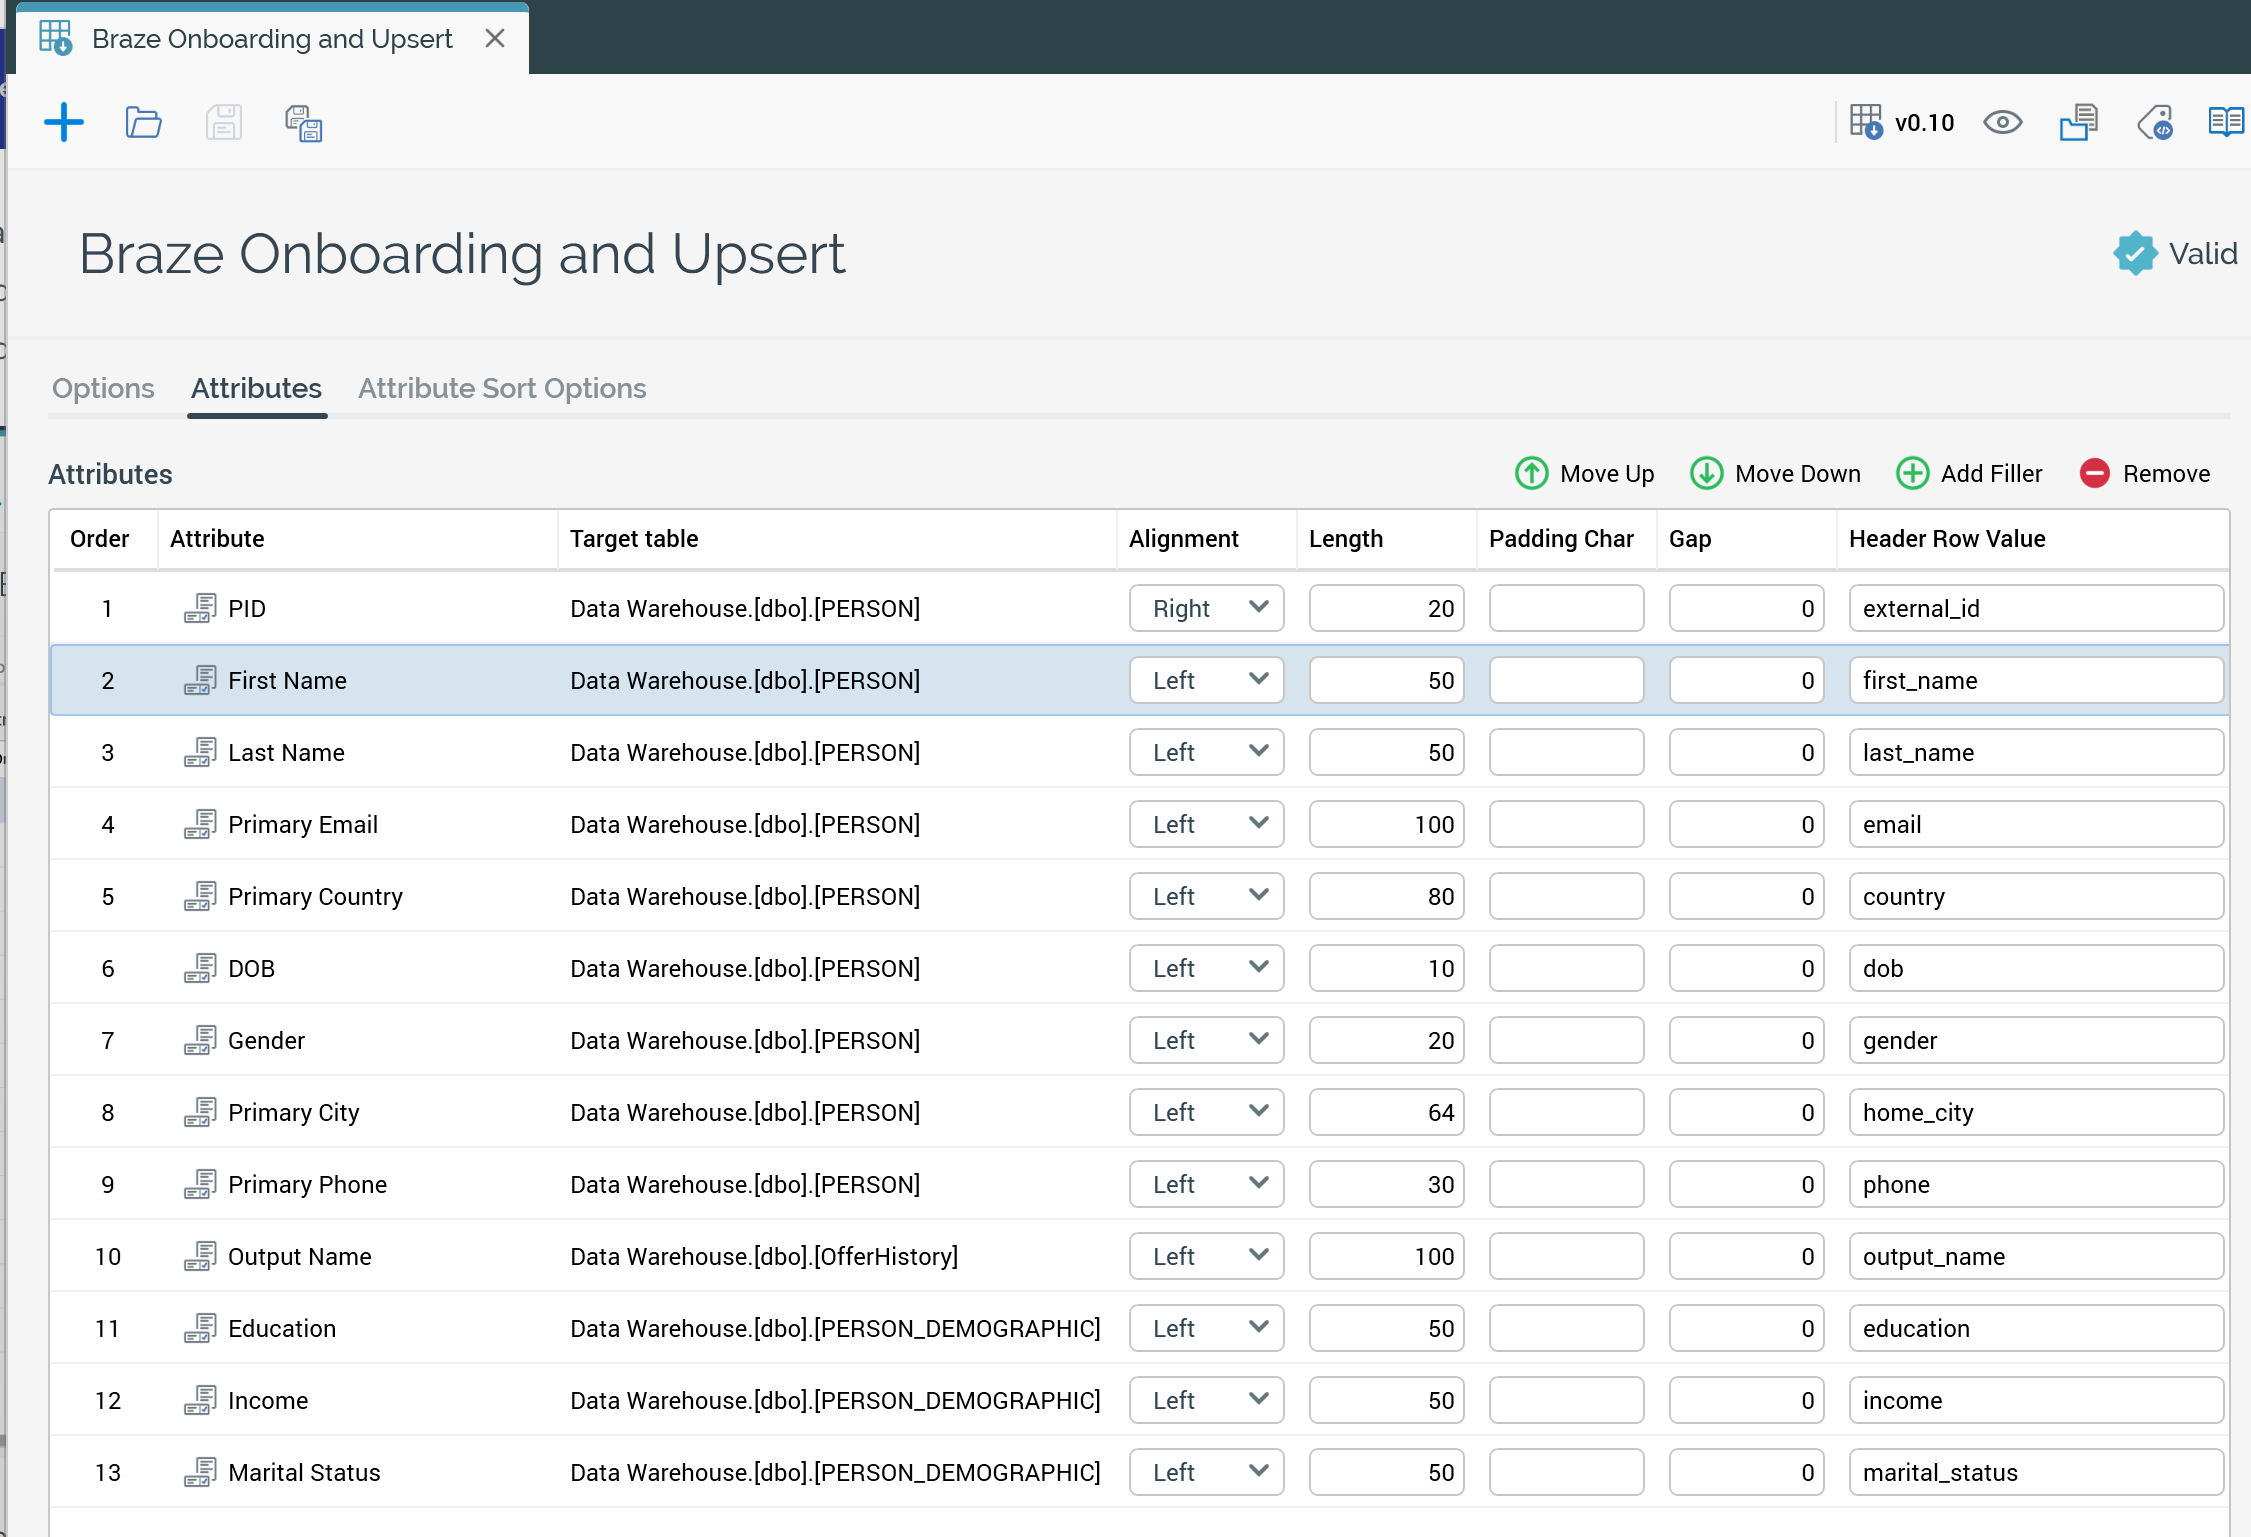
Step 1a: Create the Braze Onboarding and Upsert template
In Redpoint Interaction (RPI), create a new export template, and name it Braze Onboarding and Upsert. This template defines the core mappings between the Redpoint CDP and the Braze user profile, along with any additional custom attributes you want to add to your user profiles in Braze.
Drag Redpoint CDP attributes into the Attribute column. Set each Header Row Value to the corresponding Braze user attribute.
The following table lists Redpoint CDP attributes and their corresponding Braze attributes:
| Redpoint Attribute | Header Row Value |
|---|---|
| PID | external_id |
| Fist Name | first_name |
| Last Name | last_name |
| Primary Email | email |
| Primary Country | country |
| DOB | dob |
| Gender | gender |
| Primary City | home_city |
| Primary Phone | phone |
Add the Output Name attribute from the Offer History table. Lastly, add any additional custom Redpoint attributes you want to merge into Braze. For example, the following is an onboarding and upsert template with education, income, and marital status as additional attributes.
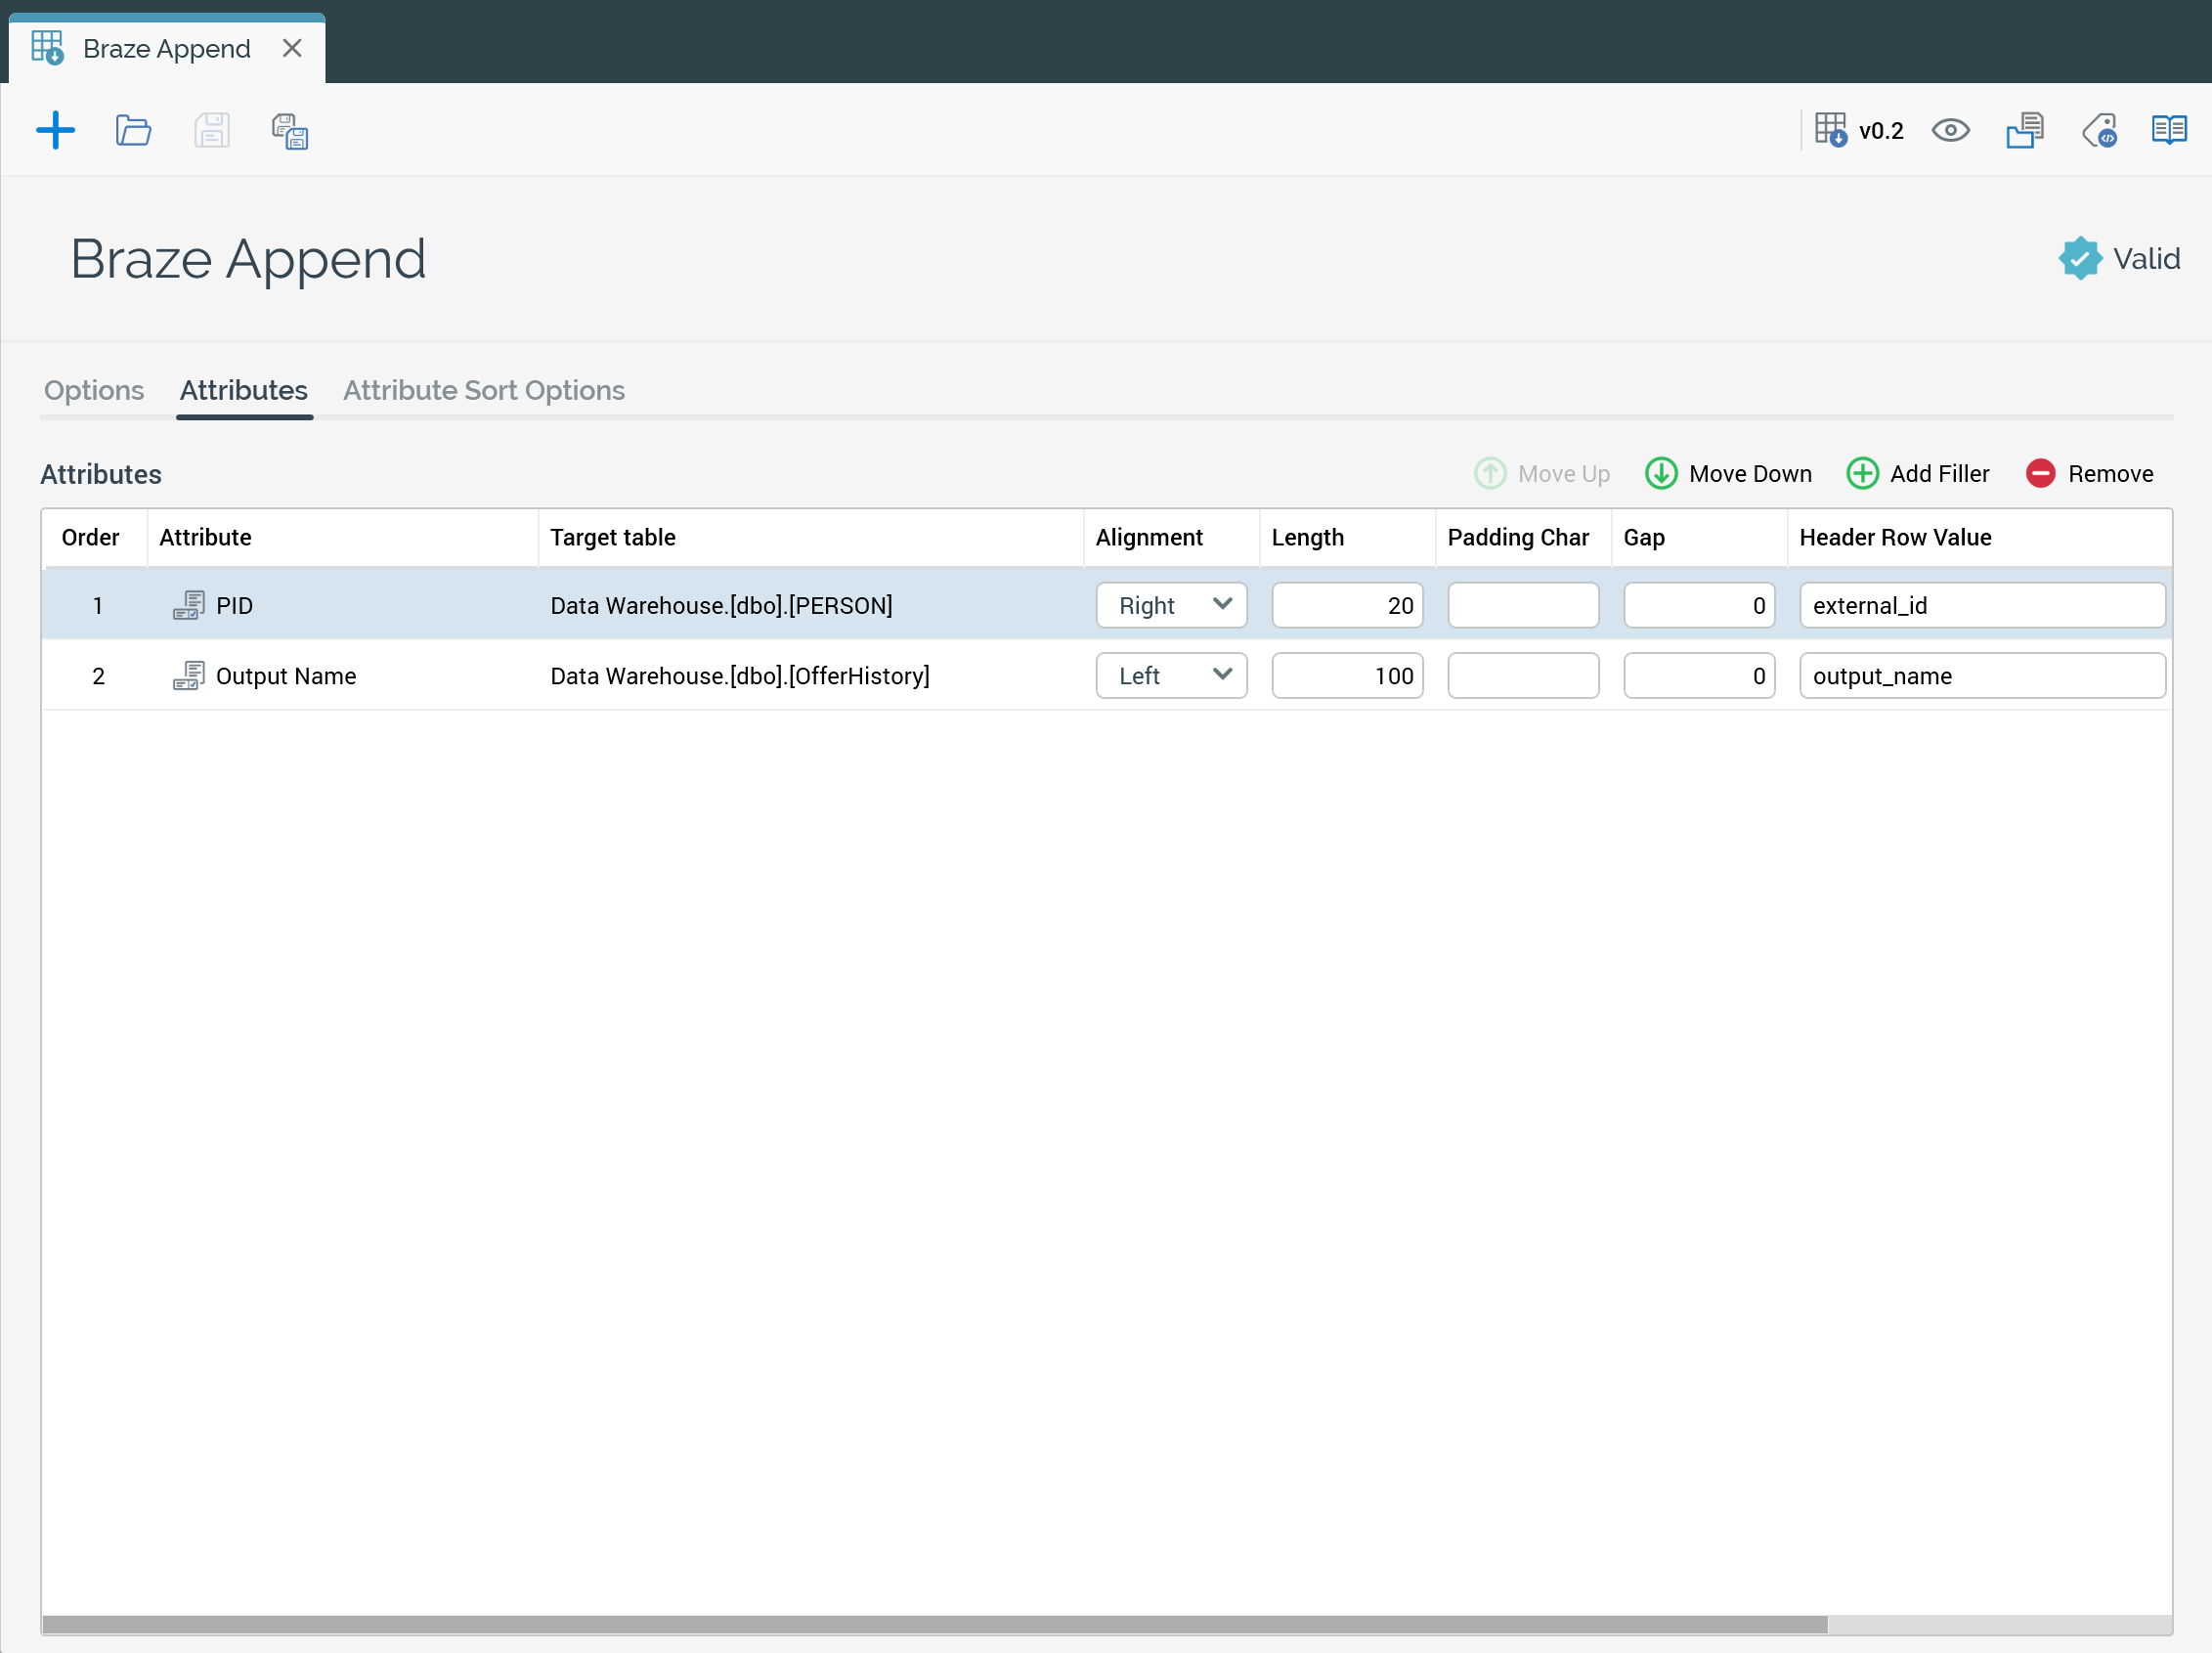
Step 1b: Create the Braze Append template
Create a second export template for append-only operations named Braze Append.
You will set only two attributes for this template. For PID, set the Header Row Value as external_id. For Output Name, set the Header Row as output_name.
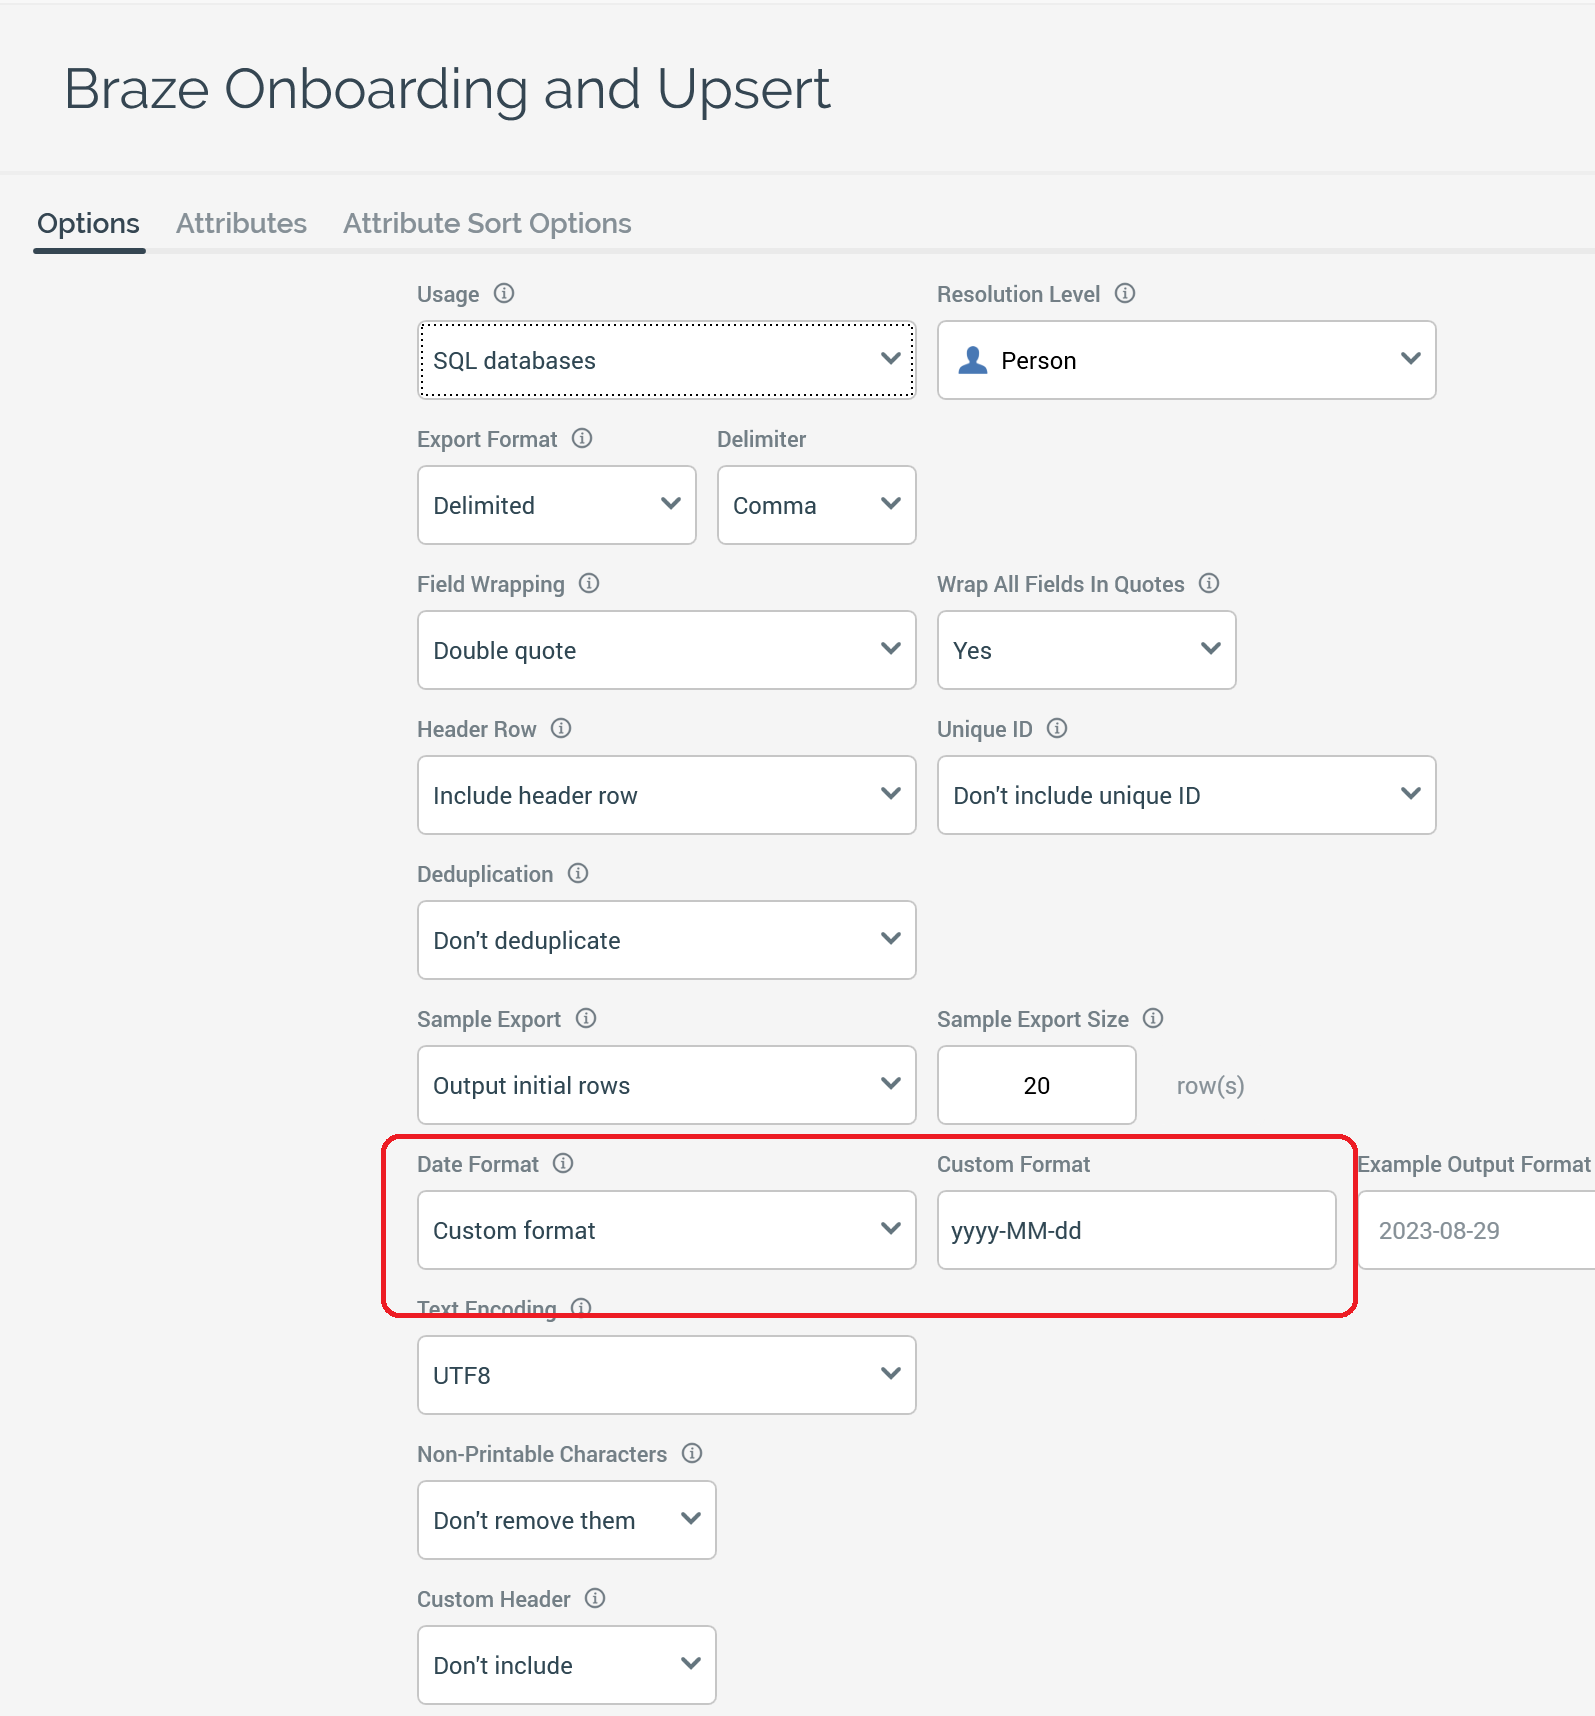
Step 1c: Set date format
For both export templates, navigate to the Options tab and set the Date Format to the value of Custom Format. Set the format as yyyy-MM-dd.
Step 2: Create outbound channels
In RPI, create two new channels. Set both channels to Outbound Delivery. Name one channel Braze Onboarding and Upsert, and the other Braze Append.
After the initial onboarding of your CDP records to Braze, check whether subsequent Redpoint Interaction workflows that use the Braze Onboarding and Upsert channel are designed to select only records that have changed since the initial onboarding sync.
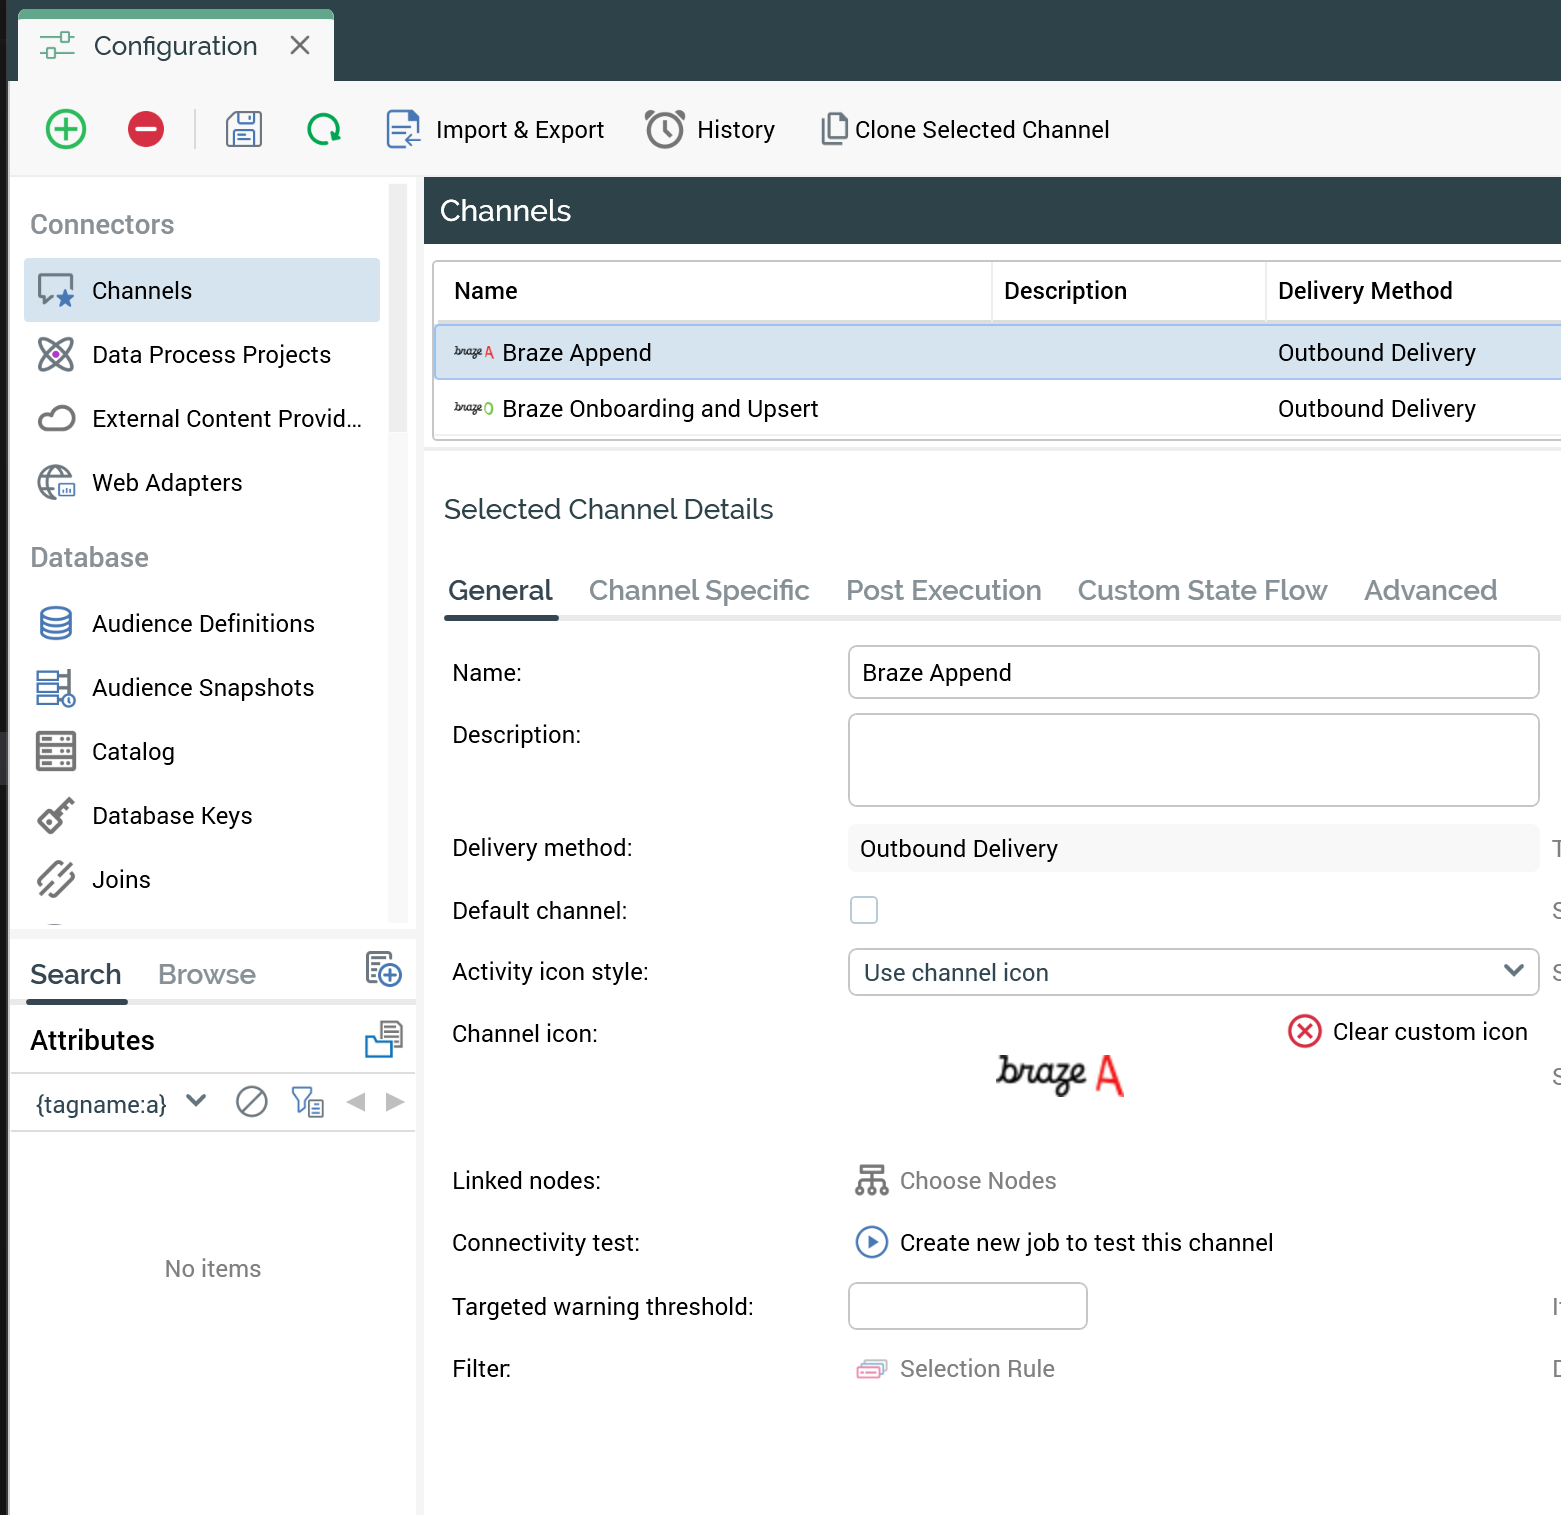
Step 3: Configure the channels
Step 3a: Set template and export path format
Navigate to the General tab in the channels Configuration screen. Set the export template to each respective channel.
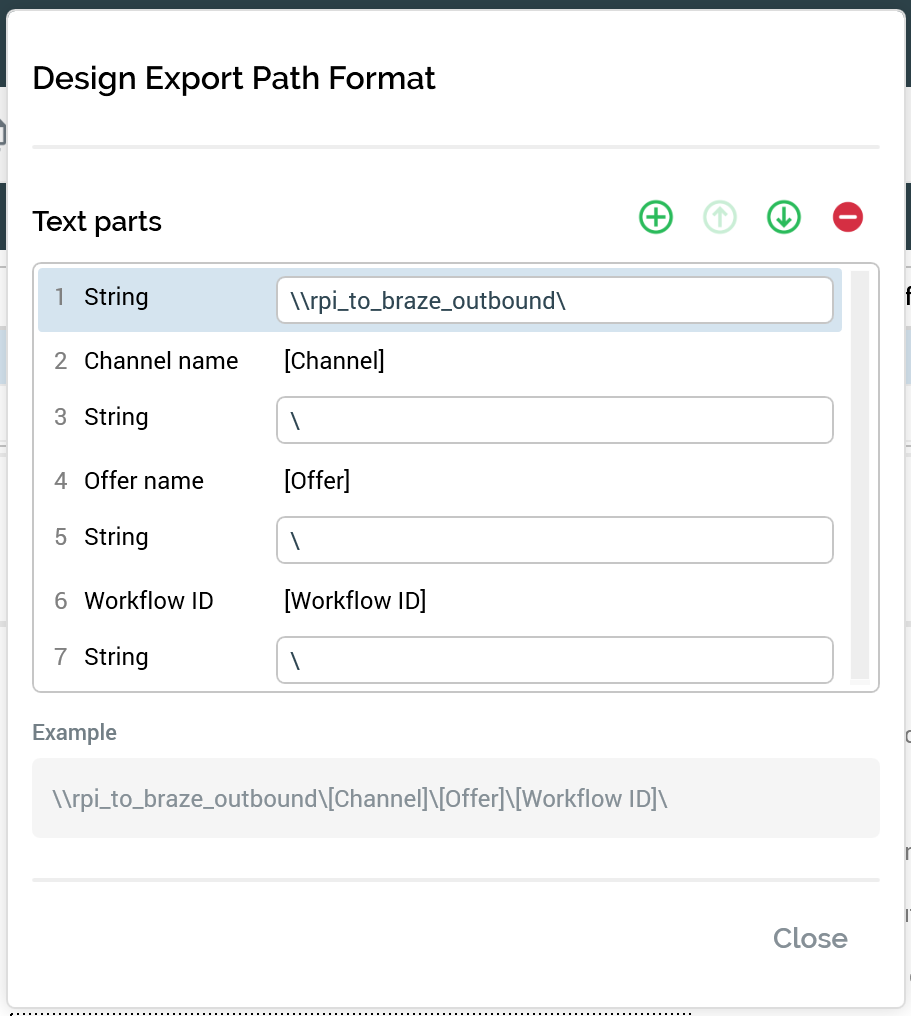
Next, define an Export path format on both channels that point to a shared network, file transfer protocol, or external content provider location that is accessible to both Redpoint Interaction and Redpoint Data Management.
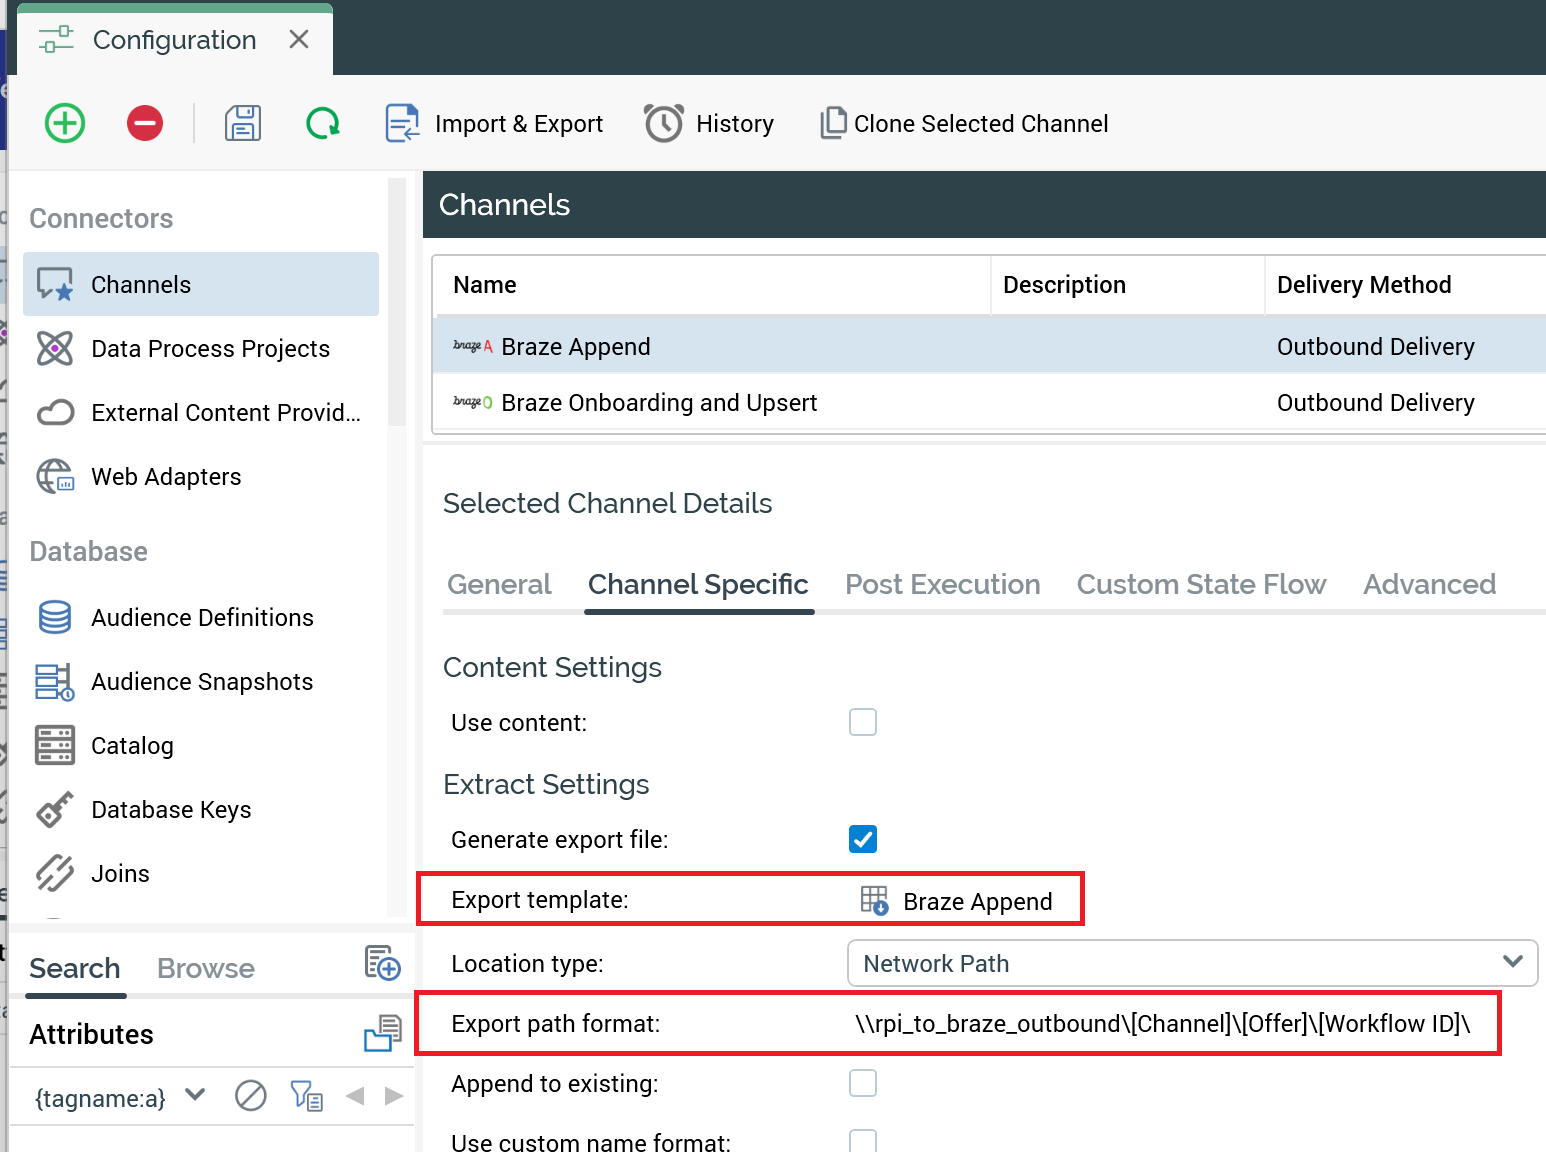
The export directory format on both channels will be identical and should end with \\[Channel]\\[Offer]\\[Workflow ID].
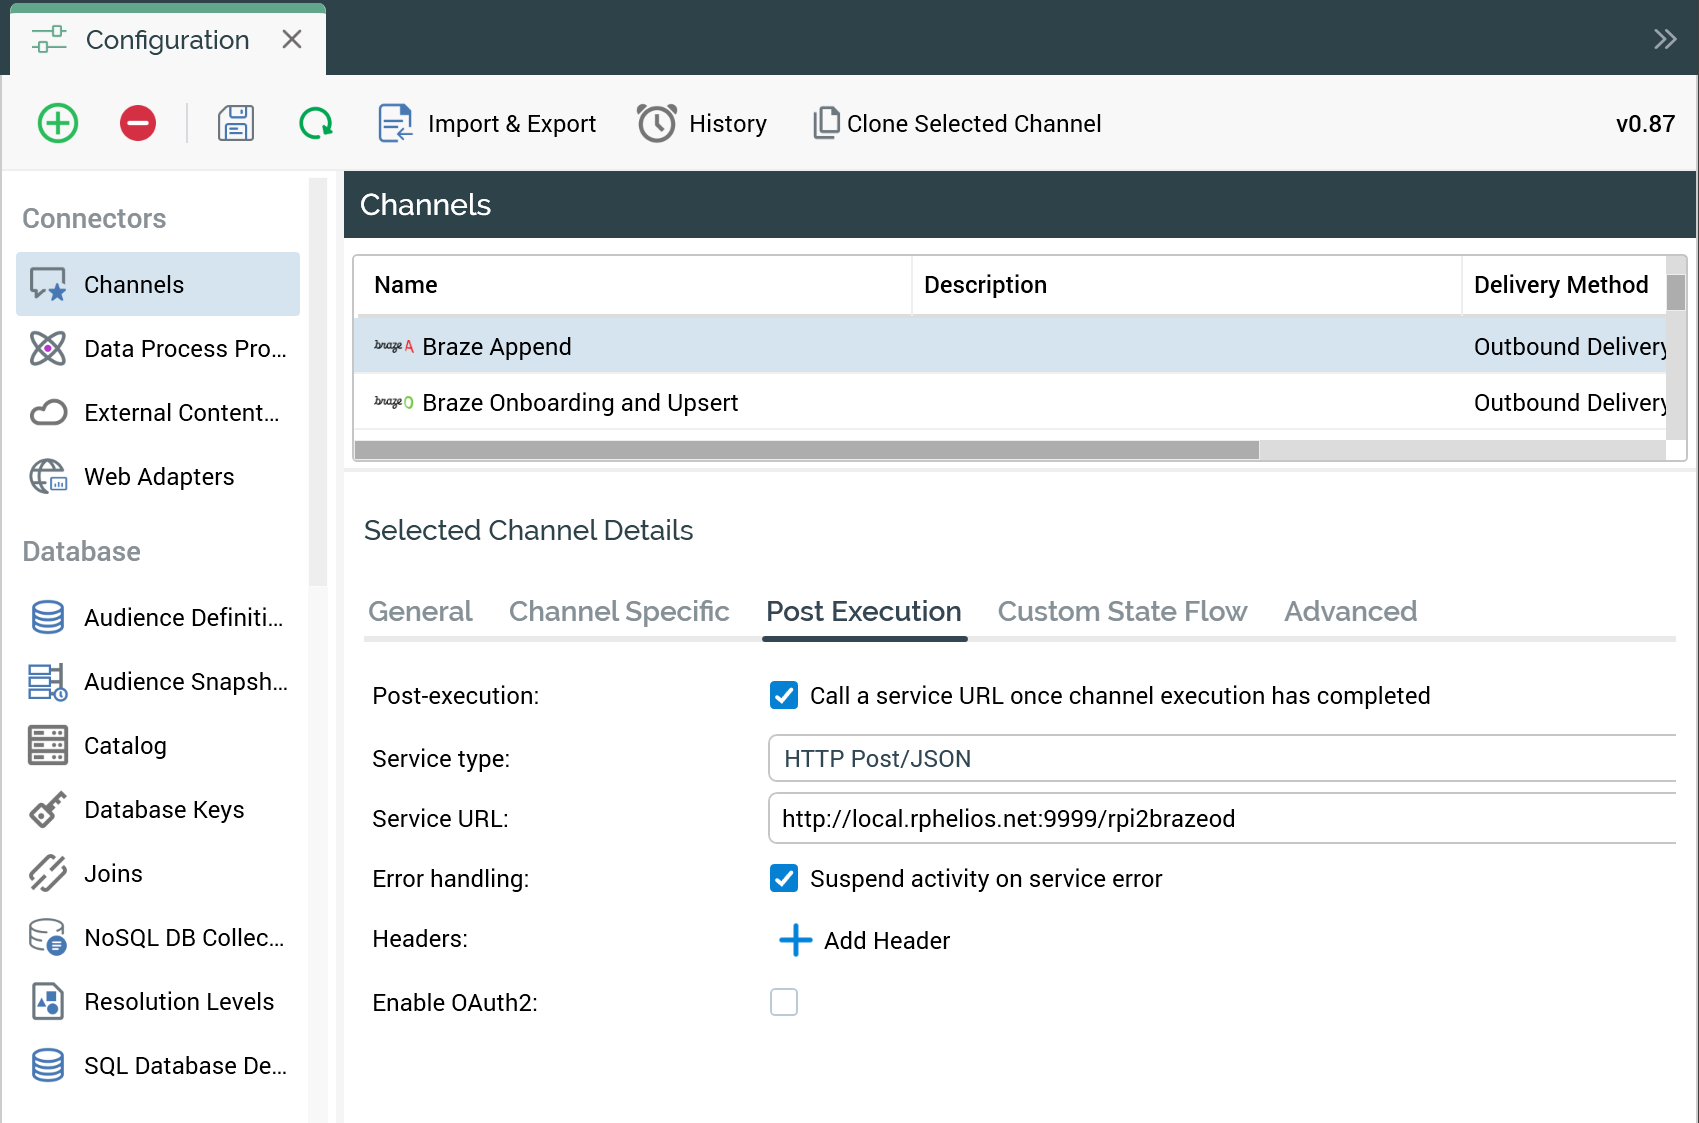
Step 3b: Configure post execution
Navigate to the Post Execution tab in the Channels Configuration screen.
Check the Post-execution checkbox to call a service URL after channel execution. Enter your Redpoint Data Management web service URL. This entry will be identical on both your Onboarding and Append channel.
Step 4: Set up Braze components in Redpoint Data Management
The archive containing Redpoint Data Management (RPDM) artifacts to support the Braze integration contains a README with detailed instructions for setting up the required components. Keep in mind the following details when configuring your integration.
Step 4a: Update the RPI to Braze automation with your Braze REST endpoint and base RPI output directory
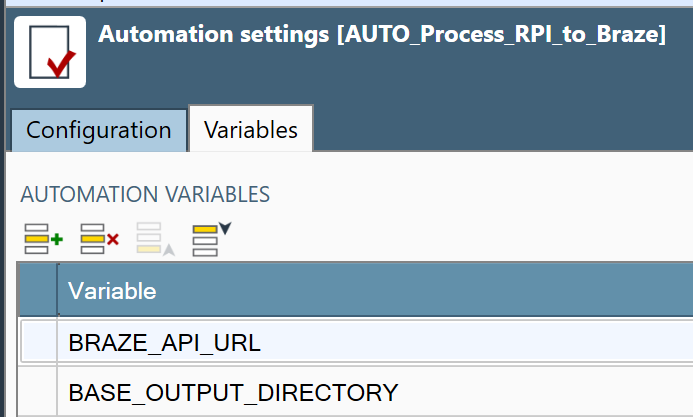
After importing the Braze related artifacts into Redpoint Data Management, open the automation named AUTO_Process_RPI_to_Braze and update the following two automation variables with the values for your environment:
- BRAZE_API_URL: The Braze REST endpoint
- BASE_OUTPUT_DIRECTORY: The shared output directory between Redpoint Interaction and Redpoint Data Management
Step 4b: Update the RPI to Braze append project
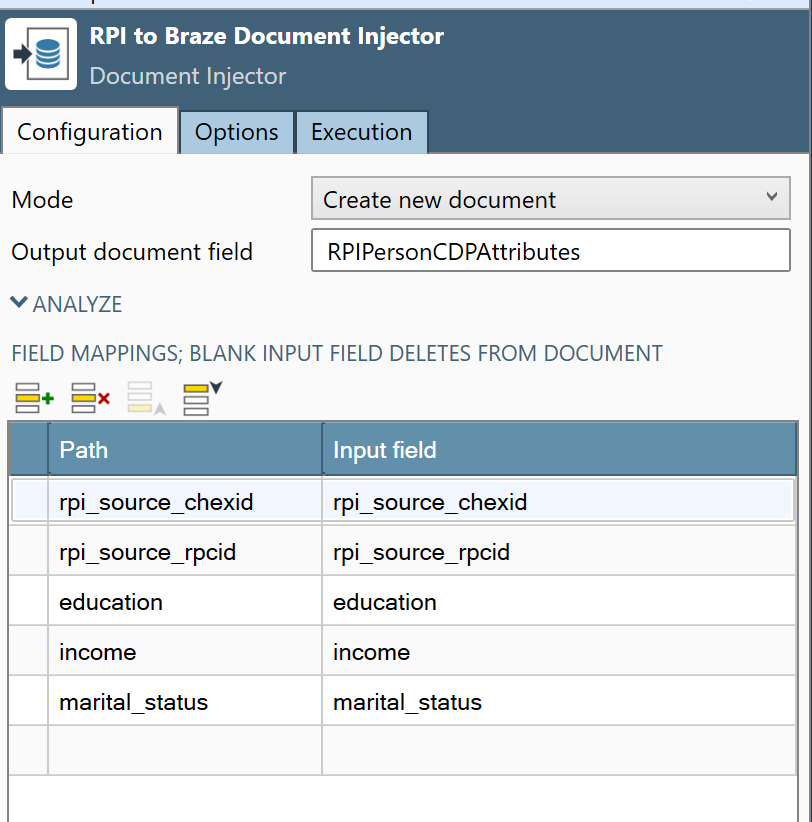
The Redpoint Data Management project named PROJ_RPI_to_Braze_Append contains the outbound delivery export file schema and mappings for the rpi_cdp_attributes custom attribute object in Braze.
Update the file input schema and document injector tool named RPI to Braze Document Injector with any additional custom CDP attributes defined in your export file template. This example shows the additional mapping of education, income, and marital status:
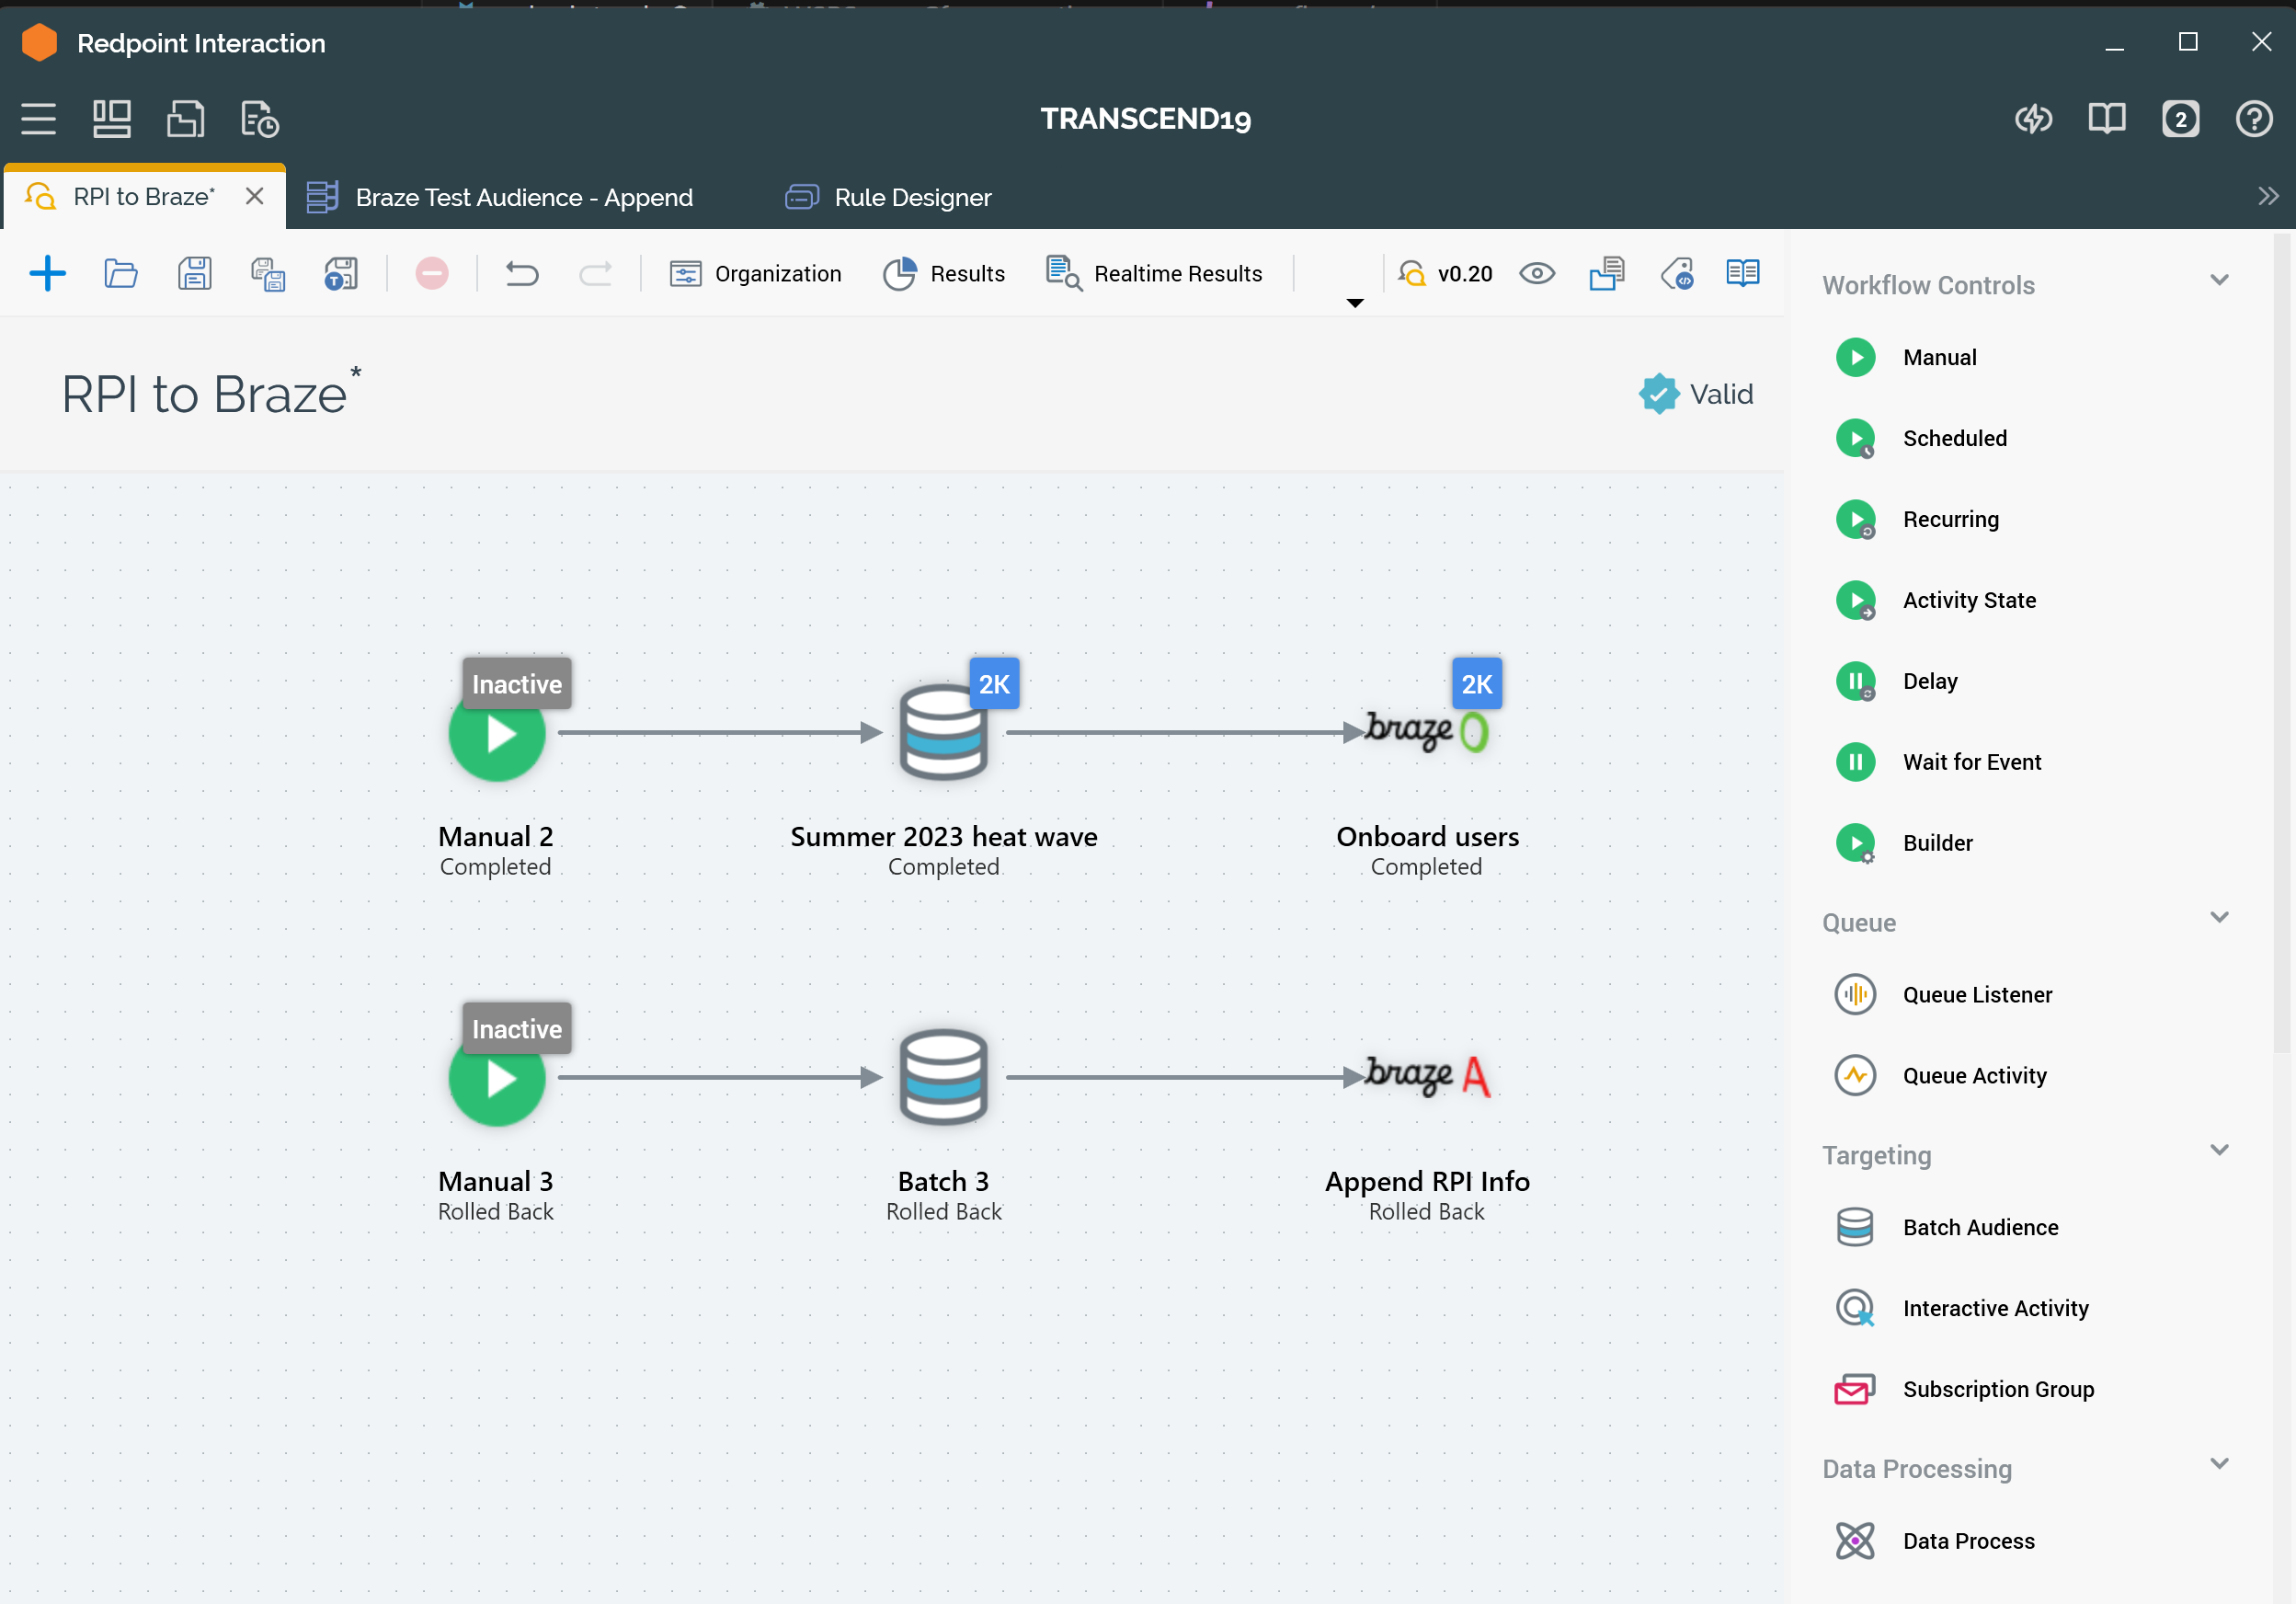
Using the integration
The Outbound Delivery Braze channel can now be leveraged within Redpoint Interaction workflows. Follow the standard practices for creating selection rules and audiences in RPI, and building associated workflow schedules and triggers.
To enable the sync of an RPI Audience output to Braze, create an outbound delivery offer and associate it to either the Braze Onboarding and Upsert or the Braze Append channel. This depends on whether the intent is to create or merge new records in Braze, or to only append campaign data if the record already exists in Braze.
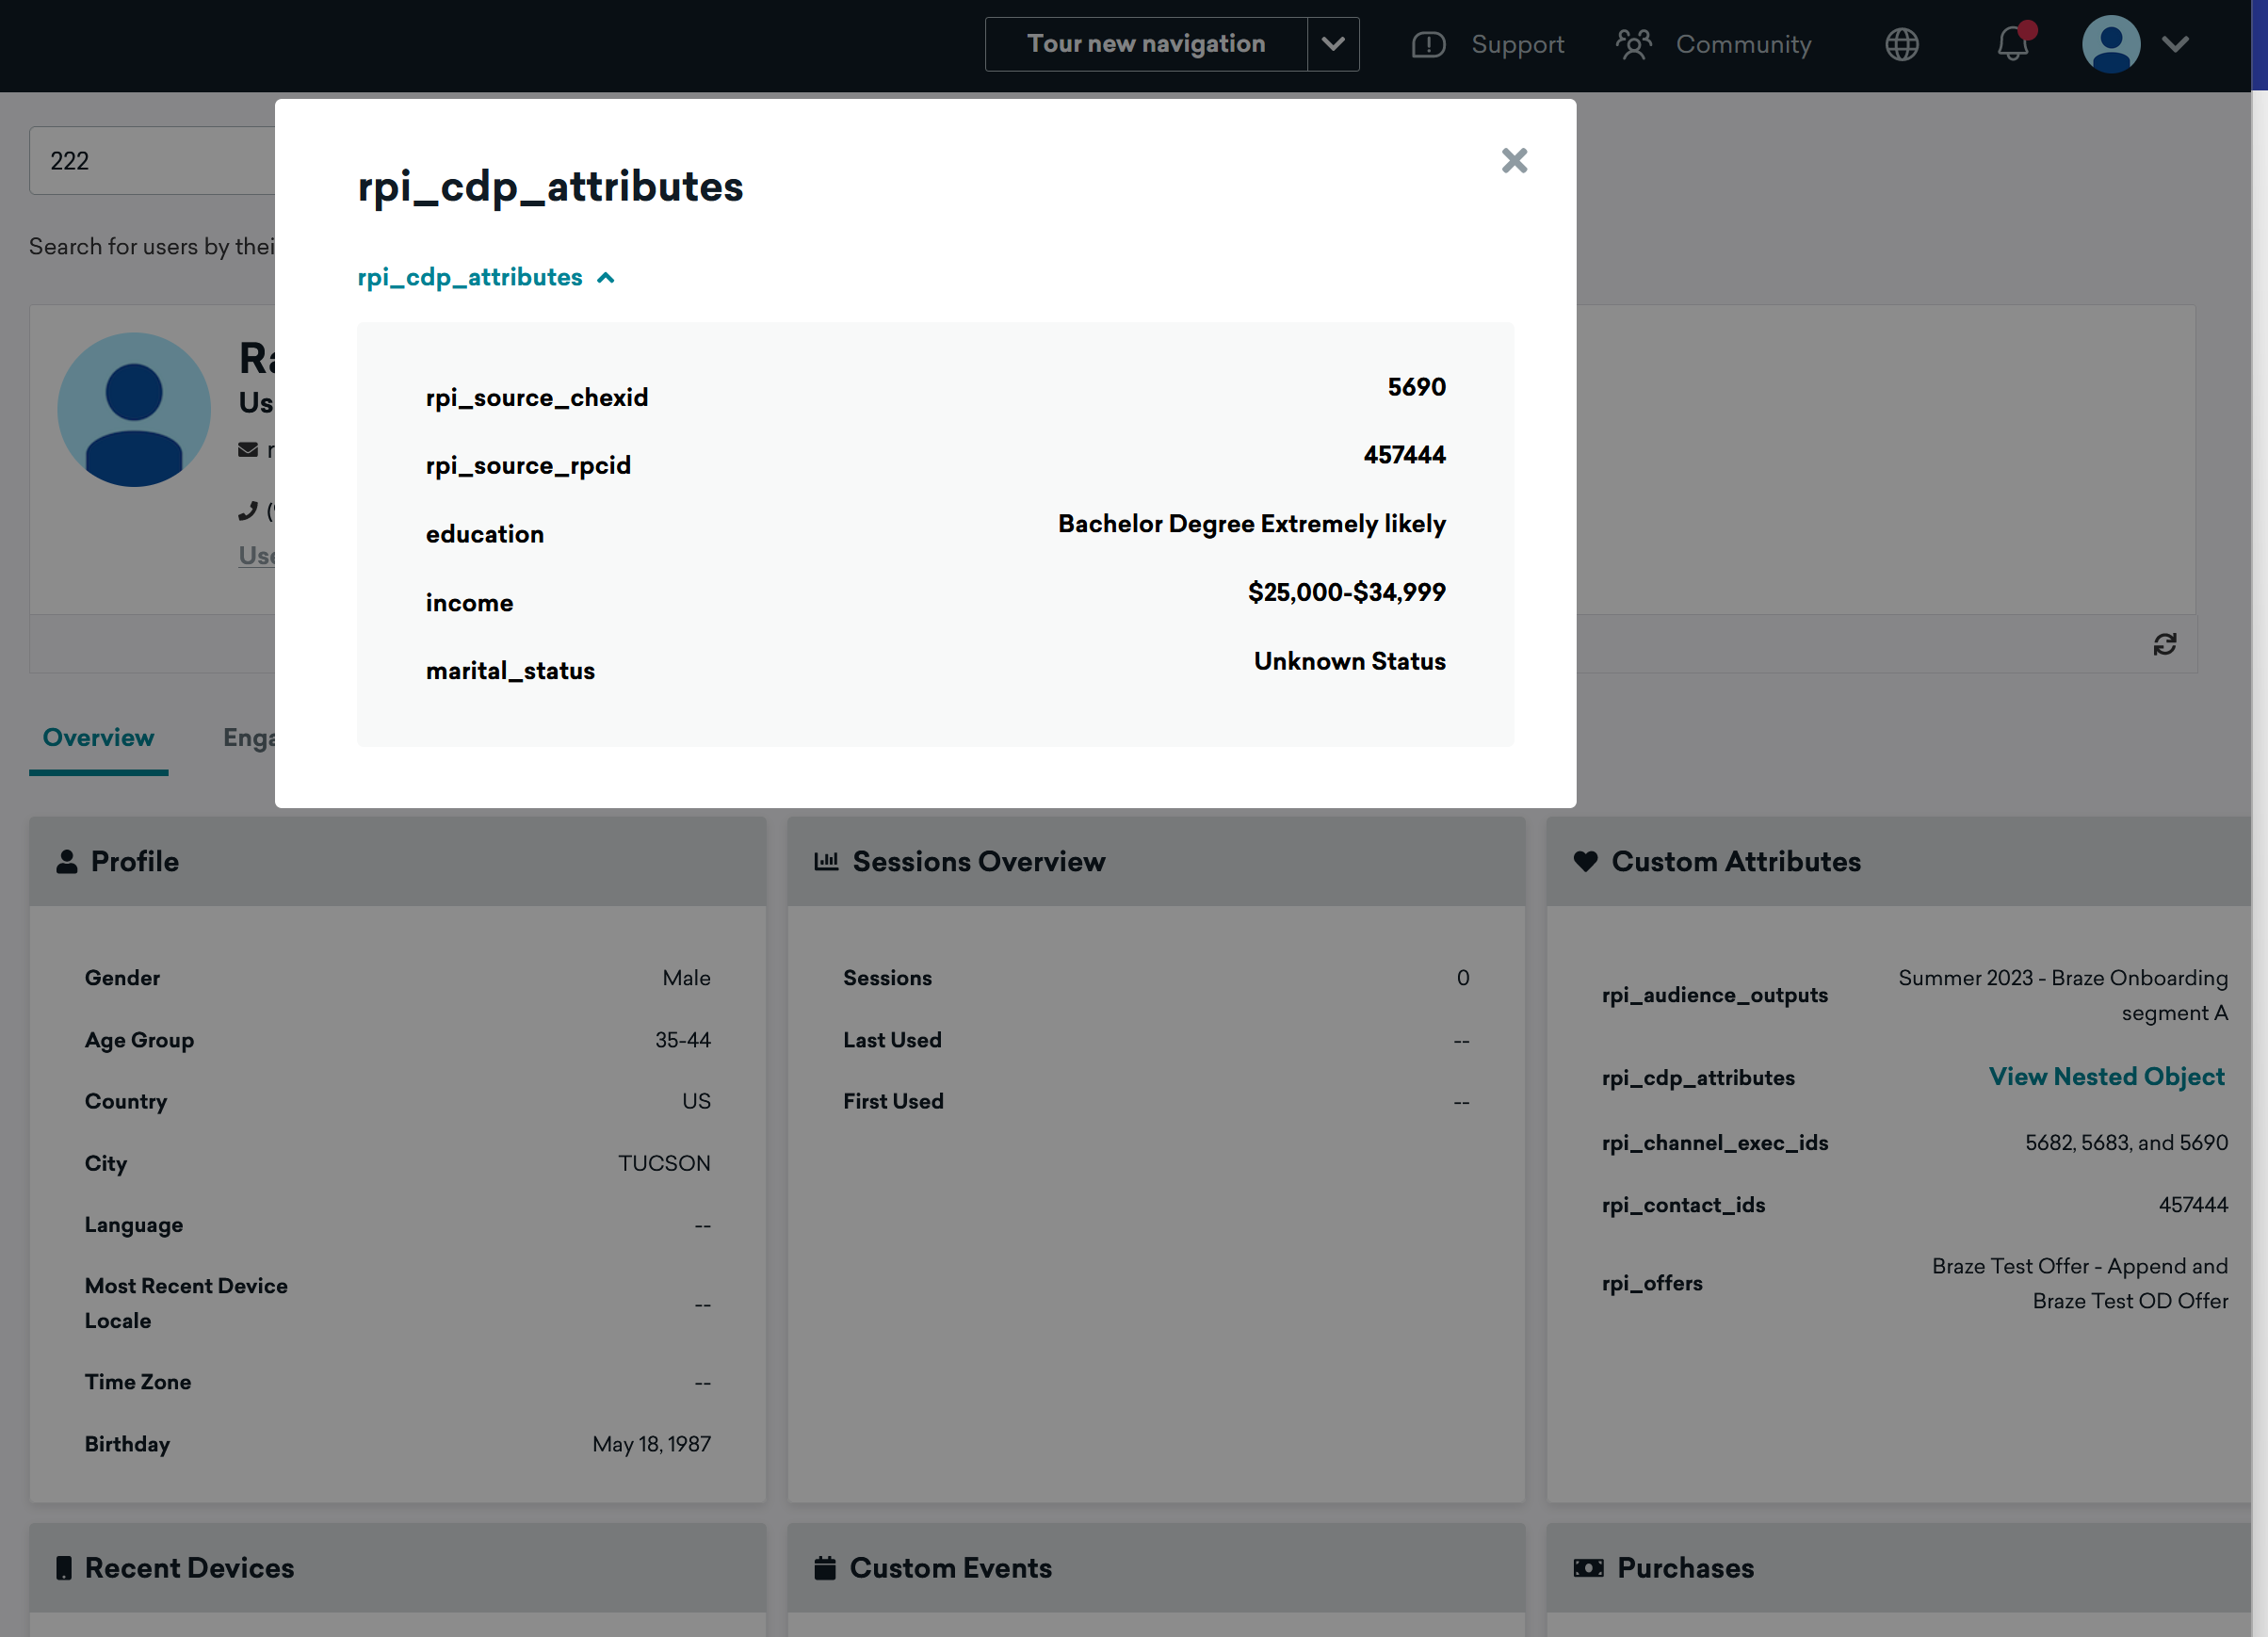
Once the workflow has executed successfully in RPI, the orchestration and CDP data sourced from RPI can now be used to create segments in Braze.
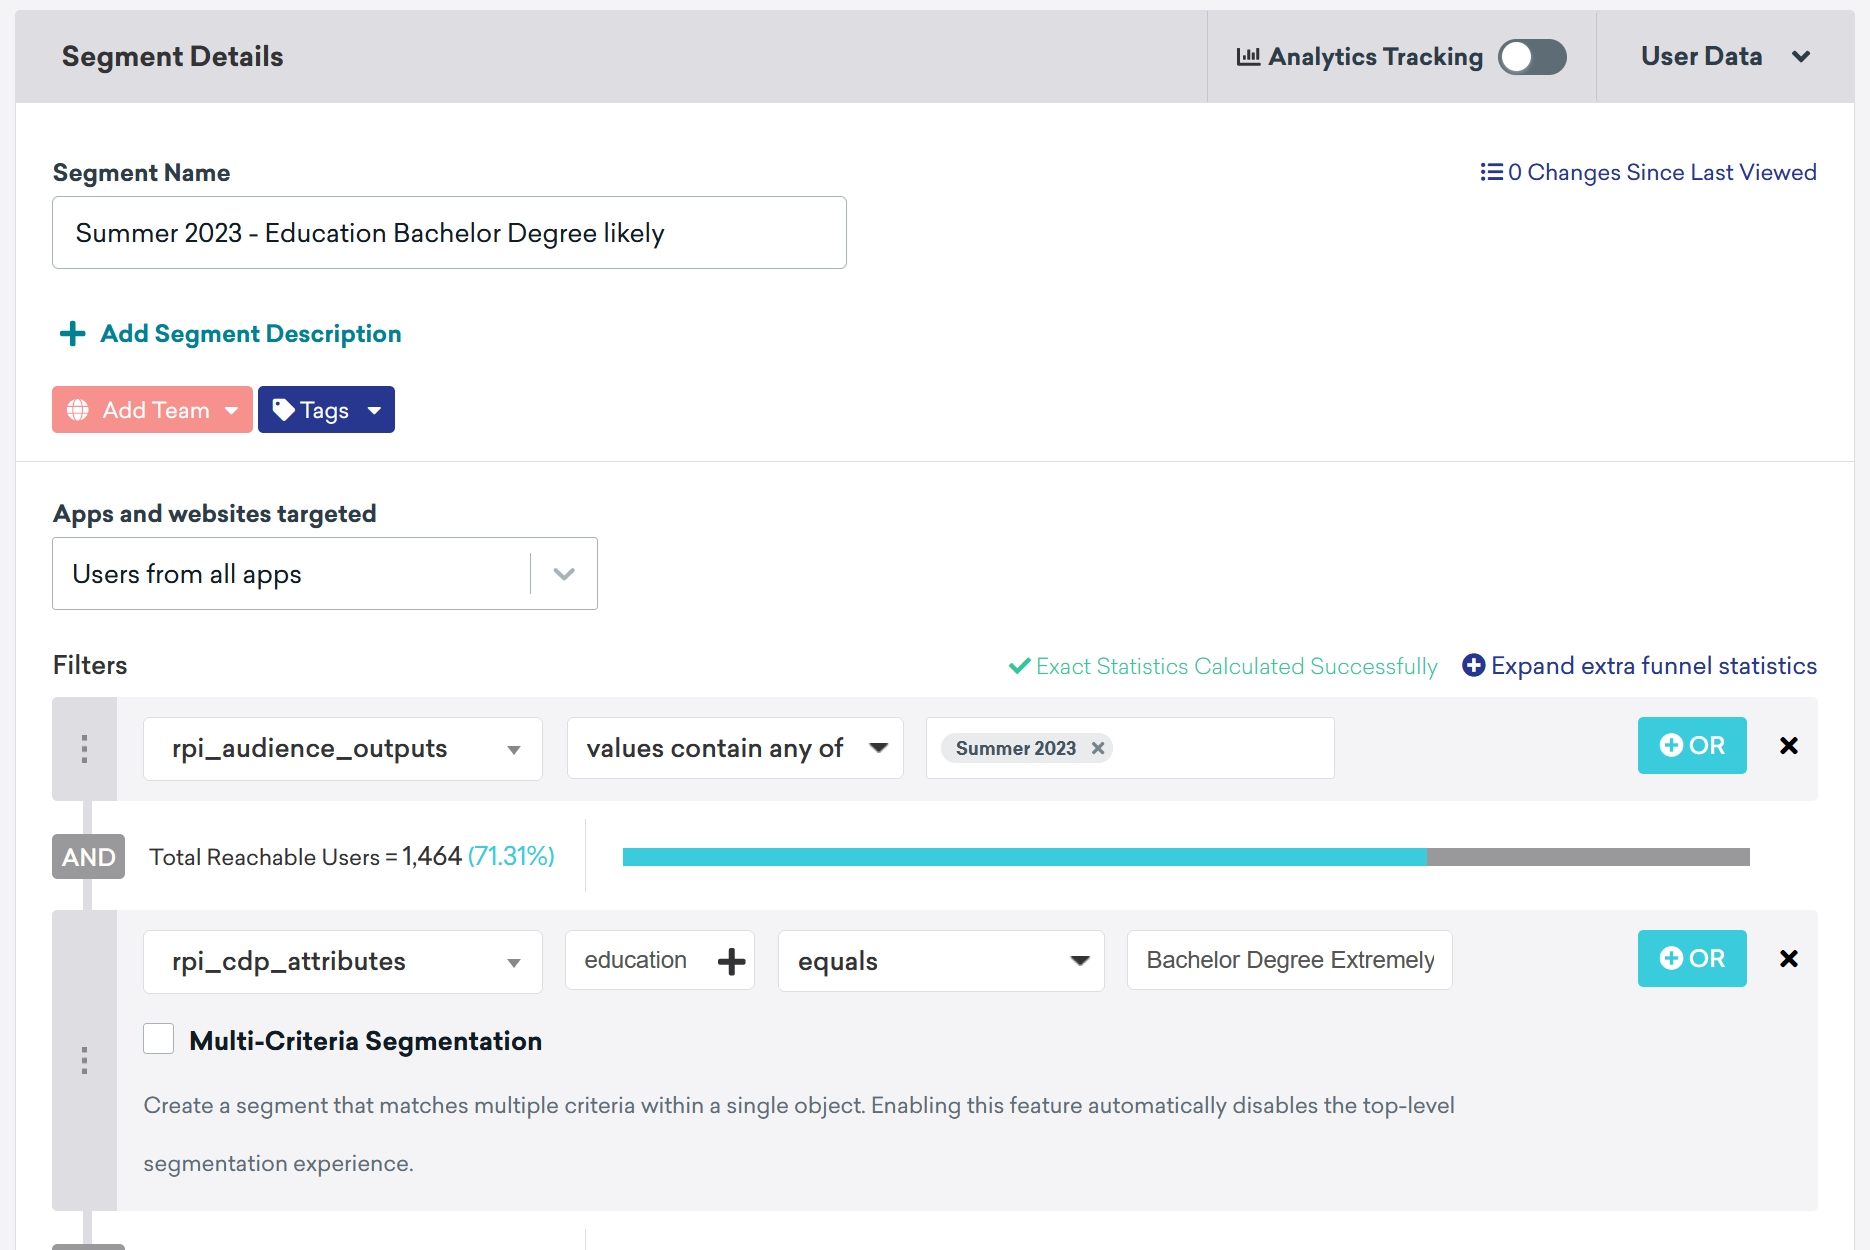
You can view the Redpoint associated properties on the user profile.
 Edit this page on GitHub