This page references our older Objective-C SDK. Check out our new Swift SDK to integrate our latest Swift-first library.
Initial SDK setup
This reference article covers how to install the Braze SDK for tvOS. Installing the Braze SDK will provide you with basic analytics functionality.
Our tvOS SDK currently supports analytics functionality. To add a tvOS app in your dashboard, open a support ticket.
The tvOS Braze SDK should be installed or updated using CocoaPods, a dependency manager for Objective-C and Swift projects. CocoaPods provides added simplicity for integration and updating.
tvOS SDK CocoaPods integration
Step 1: Install CocoaPods
Installing the SDK via the tvOS CocoaPods automates the majority of the installation process for you. Before beginning this process, ensure that you are using Ruby version 2.0.0 or greater.
Run the following command to get started:
1
$ sudo gem install cocoapods
- If you are prompted to overwrite the
rakeexecutable, refer to Getting started on CocoaPods.org for further details. - If you have issues regarding CocoaPods, refer to the CocoaPods troubleshooting guide.
Step 2: Constructing the Podfile
Now that you’ve installed the CocoaPods Ruby Gem, you’re going to need to create a file in your Xcode project directory named Podfile.
Add the following line to your Podfile:
1
2
3
target 'YourAppTarget' do
  pod 'Appboy-tvOS-SDK'
end
We suggest you version Braze so pod updates automatically grab anything smaller than a minor version update. This looks like pod 'Appboy-tvOS-SDK' ~> Major.Minor.Build. If you want to ,automatically integrate the latest Braze SDK version, even with major changes, you can use pod 'Appboy-tvOS-SDK' in your Podfile.
Step 3: Installing the Braze SDK
To install the Braze SDK CocoaPods, navigate to the directory of your Xcode app project within your terminal and run the following command:
1
pod install
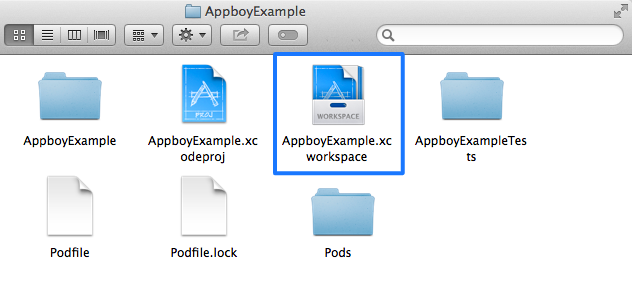
At this point, you should be able to open the new Xcode project workspace created by CocoaPods. Make sure to use this Xcode workspace instead of your Xcode project.
Step 4: Updating your app delegate
Add the following line of code to your AppDelegate.m file:
1
#import <AppboyTVOSKit/AppboyKit.h>
Within your AppDelegate.m file, add the following snippet within your application:didFinishLaunchingWithOptions method:
1
2
3
[Appboy startWithApiKey:@"YOUR-API-KEY"
         inApplication:application
     withLaunchOptions:launchOptions];
Lastly, update YOUR-API-KEY with the correct value from your Manage Settings page.
If you are integrating the Braze SDK with CocoaPods or Carthage, add the following line of code to your AppDelegate.swift file:
1
import AppboyTVOSKit
For more information about using Objective-C code in Swift projects, see the Apple Developer Docs.
In AppDelegate.swift, add following snippet to your application(application: UIApplication, didFinishLaunchingWithOptions launchOptions: [NSObject: AnyObject]?) -> Bool:
1
Appboy.start(withApiKey: "YOUR-API-KEY", in:application, withLaunchOptions:launchOptions)
Next, update YOUR-API-KEY with the correct value from your Manage Settings page.
Our sharedInstance singleton will be nil before startWithApiKey: is called, as that is a prerequisite to using any Braze functionality.
Be sure to initialize Braze in your application’s main thread. Initializing asynchronously can lead to broken functionality.
Step 5: Specify your custom endpoint or data cluster
As of December 2019, custom endpoints are no longer given out, if you have a pre-existing custom endpoint, you may continue to use it. For more details, refer to our list of available endpoints.
Your Braze representative should have already advised you of the correct endpoint.
Compile-time endpoint configuration (recommended)
If given a pre-existing custom endpoint:
- Starting with Braze iOS SDK v3.0.2, you can set a custom endpoint using the
Info.plistfile. Add theAppboydictionary to your Info.plist file. Inside theAppboydictionary, add theEndpointstring subentry and set the value to your custom endpoint URLs authority (for example,sdk.iad-01.braze.com, nothttps://sdk.iad-01.braze.com).
Runtime endpoint configuration
If given a pre-exisiting custom endpoint:
- Starting with Braze iOS SDK v3.17.0+, you can override set your endpoint via the
ABKEndpointKeyinside theappboyOptionsparameter passed tostartWithApiKey:inApplication:withLaunchOptions:withAppboyOptions:. Set the value to your custom endpoint URL authority (for example,sdk.iad-01.braze.com, nothttps://sdk.iad-01.braze.com).
Support for setting endpoints at runtime using ABKAppboyEndpointDelegate has been removed in Braze iOS SDK v3.17.0. If you already use ABKAppboyEndpointDelegate, note that in Braze iOS SDK versions v3.14.1 to v3.16.0, any reference to dev.appboy.com in your getApiEndpoint() method must be replaced with a reference to sdk.iad-01.braze.com.
SDK integration complete
Braze should now be collecting data from your application, and your basic integration should be complete. Note that when compiling your tvOS app and any other third-party libraries, Bitcode must be enabled.
Updating the Braze SDK via CocoaPods
To update a CocoaPod, simply run the following commands within your project directory:
1
pod update
Customizing Braze on startup
If you wish to customize Braze on startup, you can instead use the Braze initialization method startWithApiKey:inApplication:withLaunchOptions:withAppboyOptions and pass in an optional NSDictionary of Braze startup keys.
In your AppDelegate.m file, within your application:didFinishLaunchingWithOptions method, add the following Braze method:
1
2
3
4
[Appboy startWithApiKey:@"YOUR-API-KEY"
          inApplication:application
      withLaunchOptions:launchOptions
      withAppboyOptions:appboyOptions];
In AppDelegate.swift, within your application(application: UIApplication, didFinishLaunchingWithOptions launchOptions: [NSObject: AnyObject]?) -> Bool method, add the following Braze method:
1
2
3
4
Appboy.start(withApiKey: "YOUR-API-KEY",
                 in:application,
                 withLaunchOptions:launchOptions,
                 withAppboyOptions:appboyOptions)
where appboyOptions is a Dictionary of startup configuration values.
This method would replace the startWithApiKey:inApplication:withLaunchOptions: initialization method and is called with the following parameters:
YOUR-API-KEY: Your application’s API key is found under Manage Settings in the Braze dashboard.application: The current app.launchOptions: The optionsNSDictionarythat you get fromapplication:didFinishLaunchingWithOptions:.appboyOptions: An optionalNSDictionarywith startup configuration values for Braze.
See Appboy.h for a list of Braze startup keys.
Appboy.sharedInstance() and Swift nullability
Differing somewhat from common practice, the Appboy.sharedInstance() singleton is optional. This is because sharedInstance is nil before startWithApiKey: is called, and there are some non-standard but not-invalid implementations in which a delayed initialization can be used.
If you call startWithApiKey: in your didFinishLaunchingWithOptions: delegate before any access to Appboy’s sharedInstance (the standard implementation), you can use optional chaining, like Appboy.sharedInstance()?.changeUser("testUser"), to avoid cumbersome checks. This will have parity with an Objective-C implementation that assumed a non-null sharedInstance.
Manual integration options
You can also integrate our tvOS SDK manually - simply grab the Framework from our Public Repository and initialize Braze as outlined in the preceding sections.
Identifying users and reporting analytics
See our iOS documentation for information about setting user ids, logging custom events, setting user attributes. We also recommend familiarizing yourself with our event naming conventions.
 Edit this page on GitHub