Canvas basics
This reference article covers the basics of Canvas, covering various questions you should ask yourself as you set up your first Canvas. We’ll also explain the five W’s (what, when, who, why, and where) of visualization and how this can shape and define how you can build your Canvas.
Understanding Canvas structure
Before getting started with the finer details of Canvas setup, let’s identify the key parts that make up a Canvas.
Canvas is a unified interface where marketers craft campaigns with multiple messages. It’s a bit like a visual programming tool, letting you build a cohesive user journey out of a series of steps.

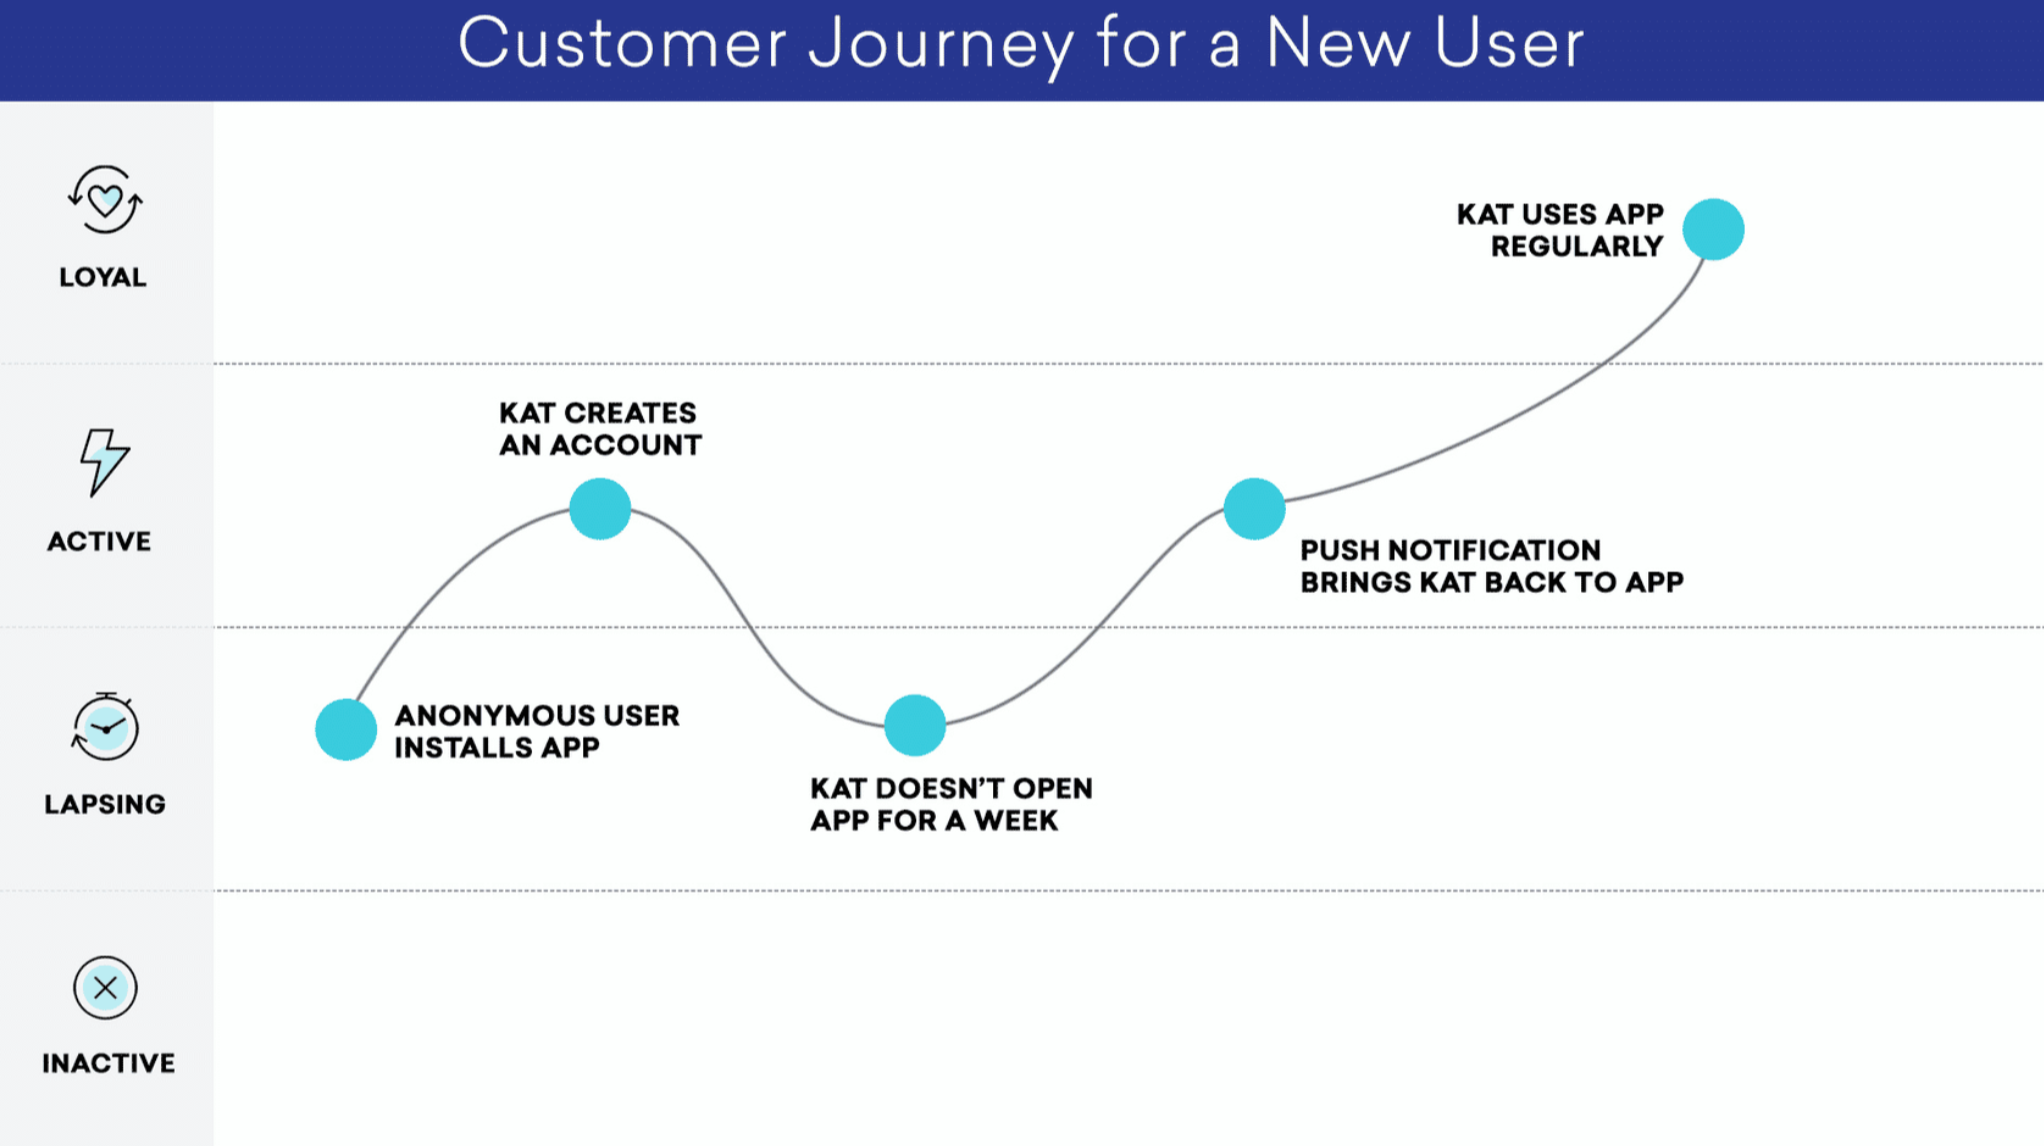
A journey, or commonly referred to as a user journey, is an individual user’s experience within the Canvas.
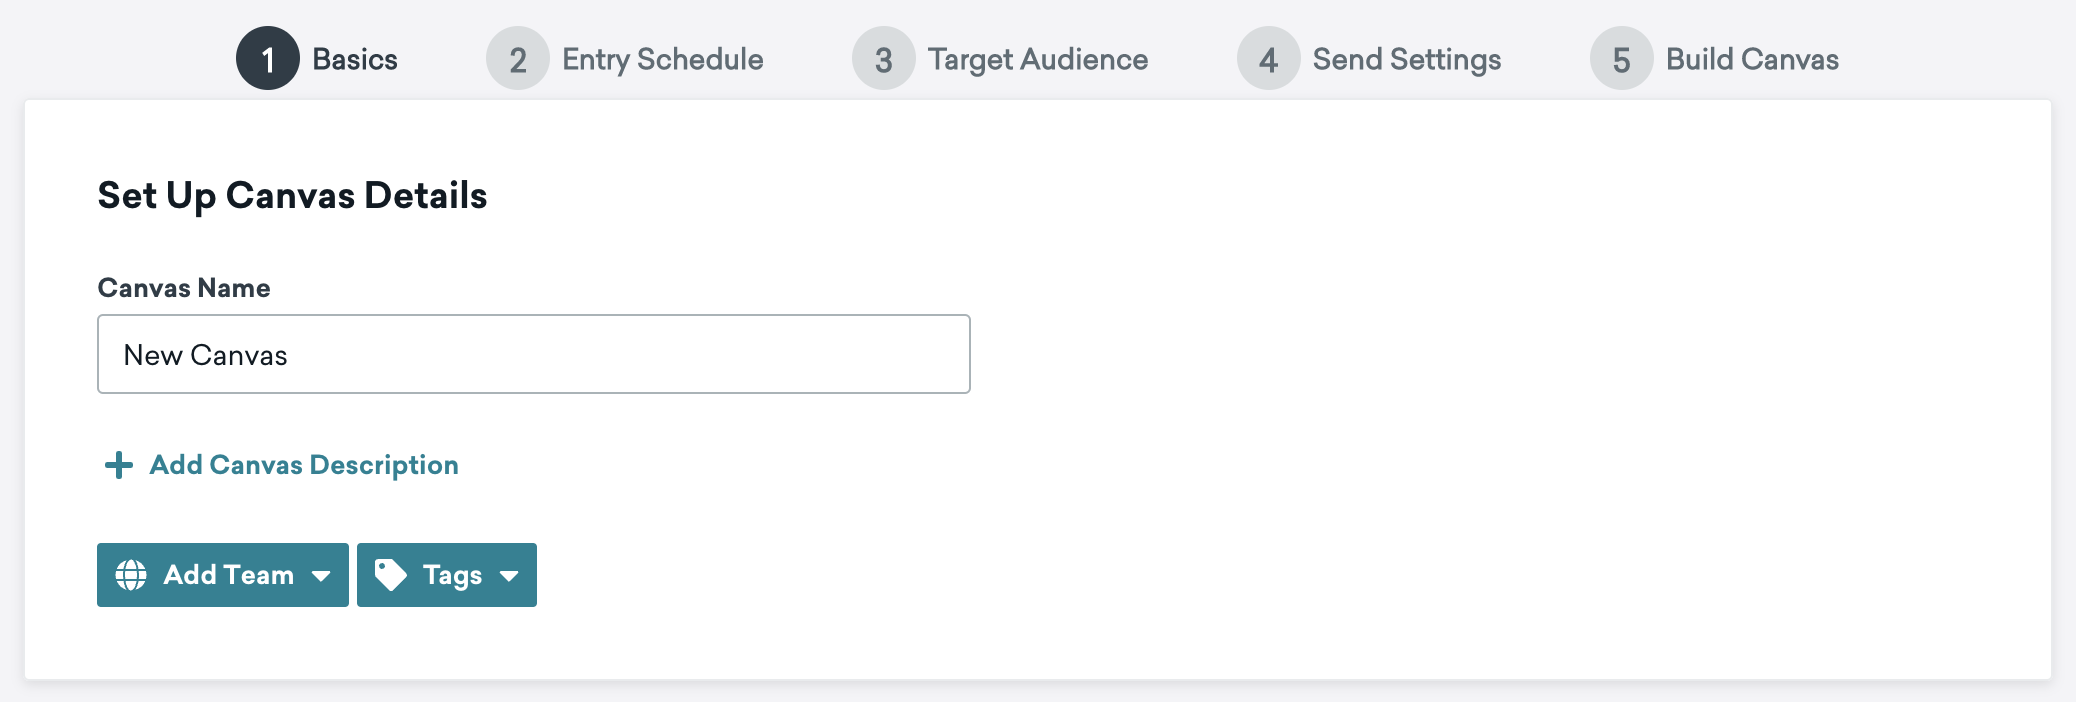
The Canvas builder maps out the steps to take when creating your Canvas. This includes basics such as naming your Canvas and adding teams. Essentially, the Canvas builder is the crucial setup required prior to beginning building your Canvas. Here, you can control the way your users begin and fulfill their customer journey with options to edit the entry schedule, target audience, and send settings.
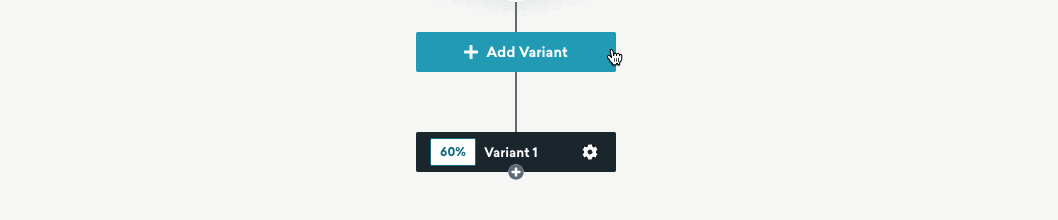
A variant is the path each customer follows on their journey. Canvas supports up to eight variants with a control group. You control which segment of your audience will follow each variant.
A step in Canvas is a marketing decision point: “if this, then that.” Leverage Canvas components to build the steps of a user journey.
Within a step, you set triggers or schedule delivery, refine targeting by adding filters or marking exception events, and specify different channels like push notifications or webhook events.

Building the customer journey
Using the five W’s (what, when, who, why, and where) of visualization can help identify your customer engagement strategies for how to create a personalized message journey for each of your users.
The “what”: Name your Canvas
What are you trying to help the user do or understand?
Never underestimate the power of the name. Braze is built for collaboration, so this is a good time to get grounded in how you’ll communicate goals with your team.
You can add tags and name the steps and variants in a Canvas. For more on customer journeys, check out our Braze Learning course on mapping user lifecycles.
The “why”: Identify conversion events
Building upon the “what”, why are you building this Canvas?
It’s always important to have a defined goal in mind and Canvas helps you understand how you are performing against KPIs like session engagement, purchases, and custom events.
Selecting at least one conversion event will give you the ability to understand how to optimize performance within the Canvas. And if your Canvas has multiple variants or a control group, Braze will use the conversion event to determine the best variation for achieving this goal.
- Start Session: I want my users coming back and engaging with the app.
- Make Purchase: I want my users to buy.
- Perform Custom Event: I want my users to perform a specific action that I’m tracking as a custom event.
- Upgrades App: I want my users to upgrade their app version.
The “when”: Create starting conditions
When will a user start this experience?
Your answer will determine the details of when and how your Canvas is delivered to your customer. Users can enter your Canvas in one of two ways: scheduled or action-based triggers.
Check out Time-based functionalities for Canvas for more strategies and answers to common questions.
Scheduled delivery allows you to send a Canvas immediately to your target audience. You can also have it sent regularly, or schedule it for a specific time in the future. Action-based Canvases respond to specific customer behaviors as they happen. For example, an action-based trigger can include opening an app, making a purchase, interacting with another campaign, or triggering any custom event. At the point of the action occurring, you can have the Canvas send to your users.
The “who”: Select an audience
Who are you trying to reach?
To define your “who”, you can use pre-defined segments available in Canvas. You can also add more filters to further focus on connecting to your targeted audience. After building these segments, only the users who match the target audience criteria can enter the Canvas journey, leading to a more personalized experience. See this table for available filters and how they segment your users to fit your use case.
| Filter | Description |
|---|---|
| Custom Data | Segment users based on events and attributes you define. Can use features specific to your product. |
| User Activity | Segment customers based on their actions and purchases. |
| Retargeting | Segment customers who have been sent, received, or interacted with previous Canvases. |
| Marketing Activity | Segment customers based on universal behaviors such as the last engagement. |
| User Attributes | Segment customers by their constant attributes and characteristics. |
| Install Attribution | Segment customers by their first source, ad group, campaign, or ad. |
The “where”: Find my audience
Where can I best reach my audience?
This is where we determine which messaging channels make the most sense for your user journey. Ideally, you’d want to reach your users where they’re most accessible. With that in mind, you can use any of the following channels with Canvas:
The “how”: Build the complete experience
How do I build my Canvas journey after identifying the five W’s?
The “how” collectively summarizes how you’ll create your Canvas and how you’ll reach your users with your message. For example, in order for a message to be effective, you should optimize the timing of your messaging with regards to the time zones across your different users.
Answering “how” also determines the cadence for sending a Canvas to your audience (such as once a week or biweekly), and which messaging channels to leverage for each Canvas that you build as described with the “where.”
Example: Customer onboarding flow
For example, let’s say you’re a marketer for MovieCanon, an online streaming services company, and you’re in charge of creating an onboarding flow for new users of your app. By referencing the five W’s, we could build out the Canvas in the following way.
- What: Our Canvas name will be “New Onboarding Journey”.
- Why: The goal of our Canvas is to welcome our users and have them continue engaging with the app.
- When: After a user first opens the app, we want to send them an email to welcome them.
- Who: We’re targeting new users who are using our app for the first time.
- Where: We are confident we can reach new users through their email, which is how we’ve done all our past messaging.
- How: We want to set a one day delay as to not overwhelm our new users with notifications. After this delay, we’ll send an email with a list of the most popular movies and TV shows to entice them to keep using the app.
General tips
Determine when and how to use steps and variants
Each Canvas must have at least one variant and at least one step. The sky’s the limit from there—so how do you decide on the shape of your Canvas? This is where your goals, data, and hypothesis come into play. The “how” and “where” brainstorm will help you map out the right shape and structure of your Canvas.
Work backwards
Some goals have smaller sub-goals. For instance, if you’re aiming to convert a free user into a subscription, you may need a page with your subscription services outlined. A visitor may need to see the options before they purchase. You may focus your messaging efforts on showing them this page before a checkout page. Working backward to understand the journey a customer must go through to get to your goal is key to guiding them through to conversion.
Mix up your messaging
Have you run a similar campaign in the past? Or is one currently running? Try using that one message and adding more personalization to it. Try a new filter or add a follow-up message. As you mix up your messaging techniques, monitor your performance and keep optimizing by making incremental changes.
 Edit this page on GitHub